Mass Updating
The Mass Update tool is the fastest way to add, update, and manage large numbers of accounts and contacts.
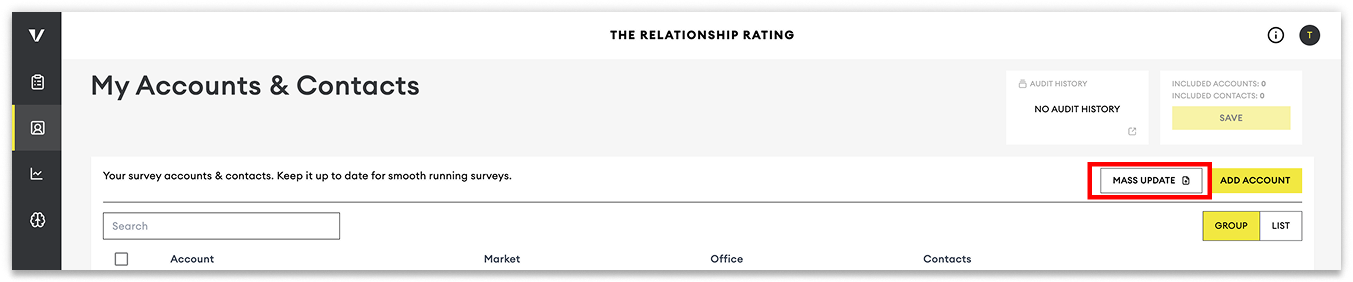
To get started, navigate to the Accounts & Contacts page and click Mass Update in the top-right corner of the table.
This will launch a guided import process that walks you through uploading, mapping, and reviewing your data before applying any changes.
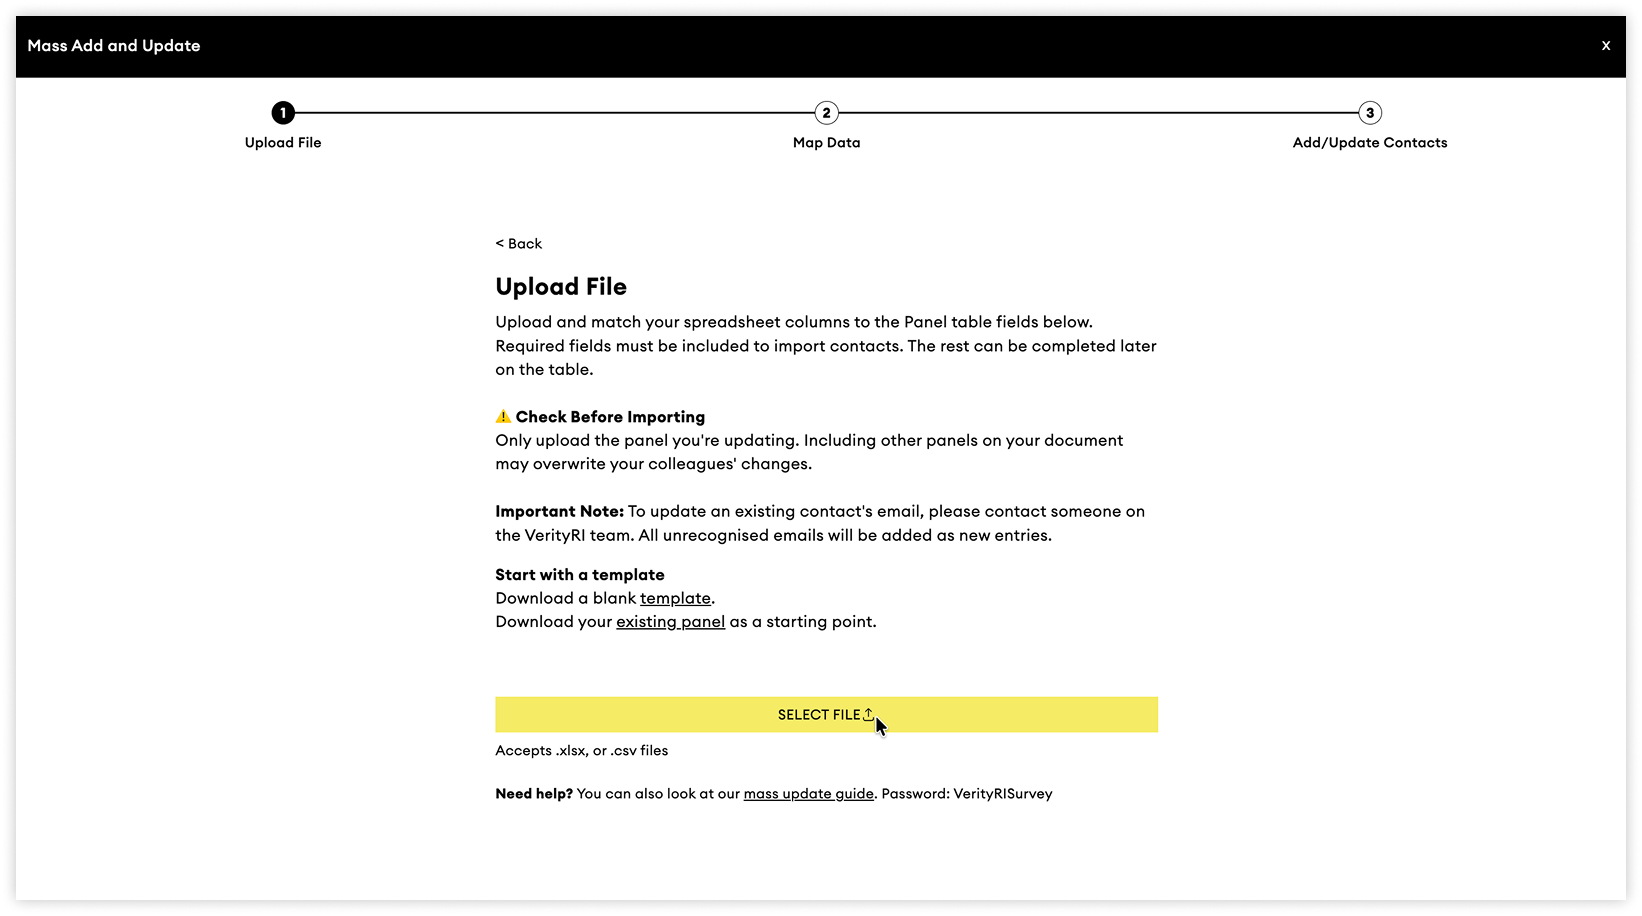
Step 1: Upload Your File
Upload your data using either an Excel (.xlsx) or CSV (.csv) file.
You can upload data in one of three ways:
Option 1: Download Our Template (Recommended)
The link to the template can be found in the first step. It contains all required fields and uses the exact column structure expected by the platform.
The second tab of the template includes:
Field definitions
Allowed values
Formatting guidance
This is the easiest way to ensure a successful import.

Option 2: Export Your Existing Database
If you're simply updating existing accounts or contacts:
Export your current Accounts & Contacts list.
Make your changes offline.
Upload the updated file using Mass Update.
This is often the quickest option when making changes to existing records.
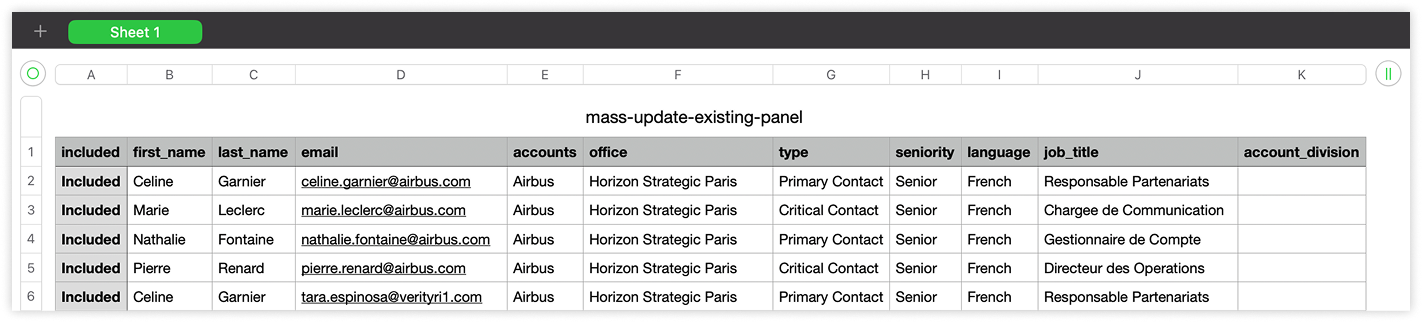
Option 3: Upload Your Own Spreadsheet
You can also upload a file exported from your CRM or another data source.
Supported formats include:
CSV (.csv)
Excel (.xlsx)
Depending on your file structure, additional field mapping may be required during the next step.
TIP: The first row of your file is always treated as the header row.
Make sure your column titles are located in Row 1.
Step 2: Map Your Data
After uploading your file, you'll be asked to map your spreadsheet columns to the corresponding fields in the platform.
Column Headers
The first row of your file is always treated as the header row. Make sure your column titles are located in Row 1.
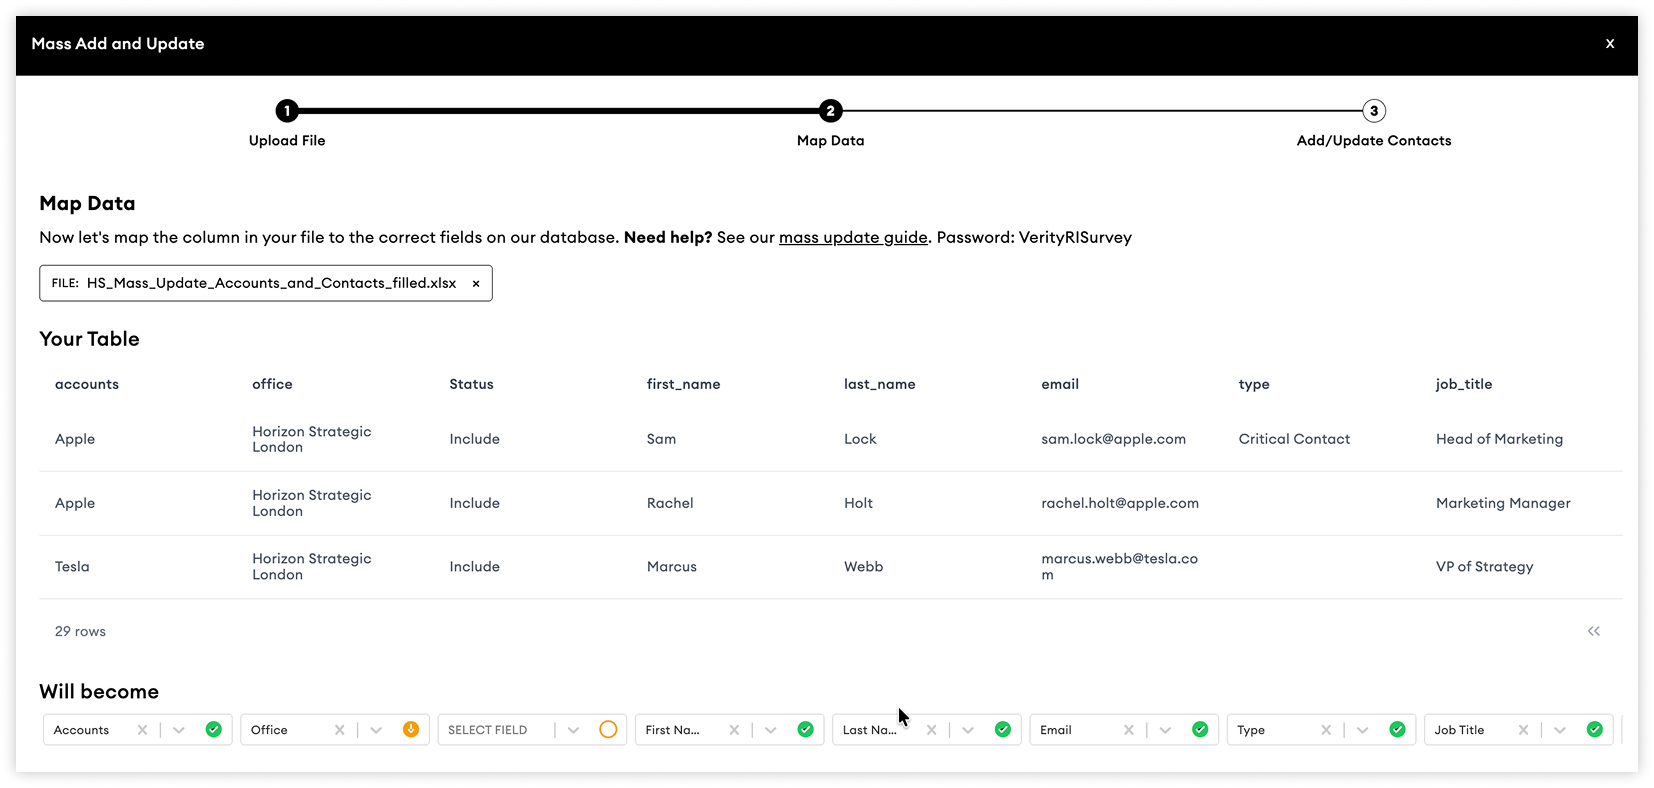
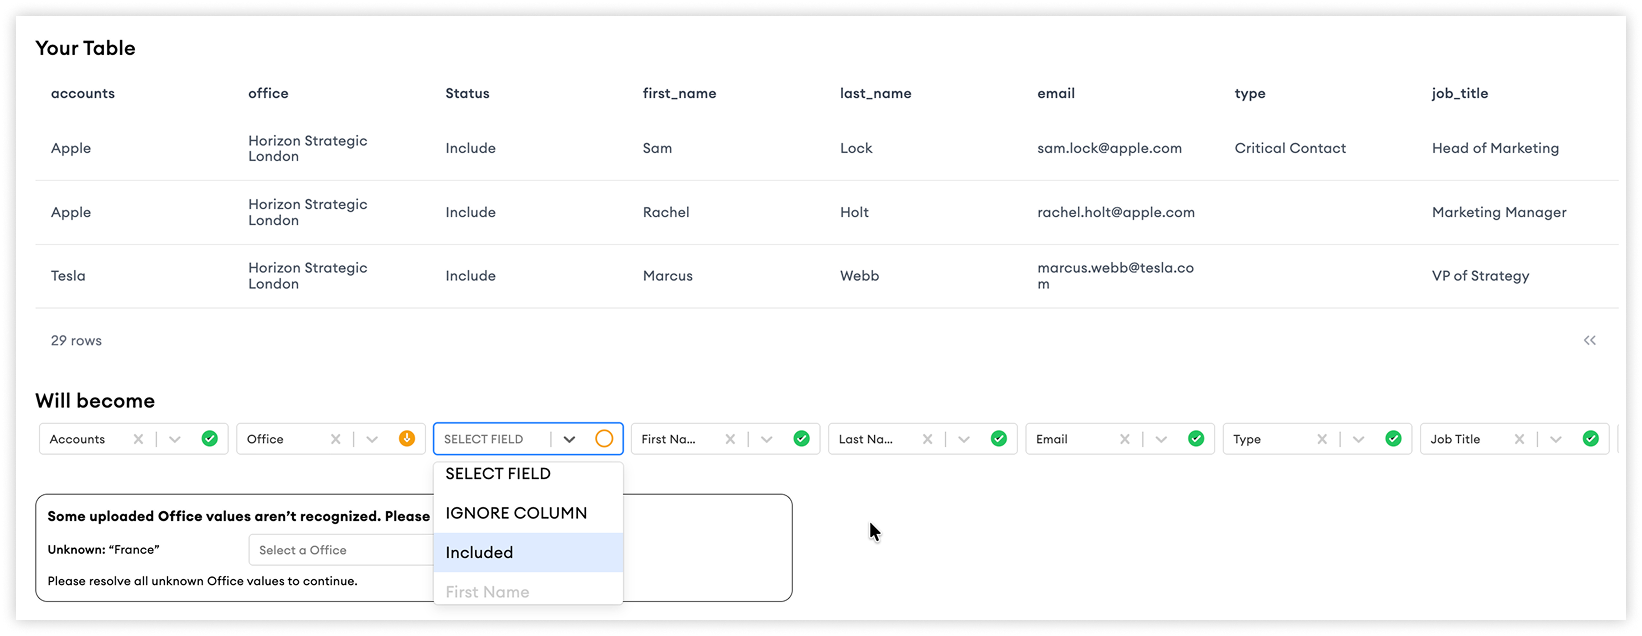
If a column header matches one of the platform's fields, it will be mapped automatically. You’ll see what headers are successfully matched by the green checks
Scroll to the right to see all rows if needed.
Manual Mapping
You’ll need to map the headers that do not have a green check. You do this by selecting the drop-down menu within each column header.
For each column, you can:
Select a different field
Change an existing mapping
Choose Ignore Column if the data is not required
Only valid system fields can be selected, and headers can only be selected once; for example, it will not let you select two email columns.
Unmatched Values
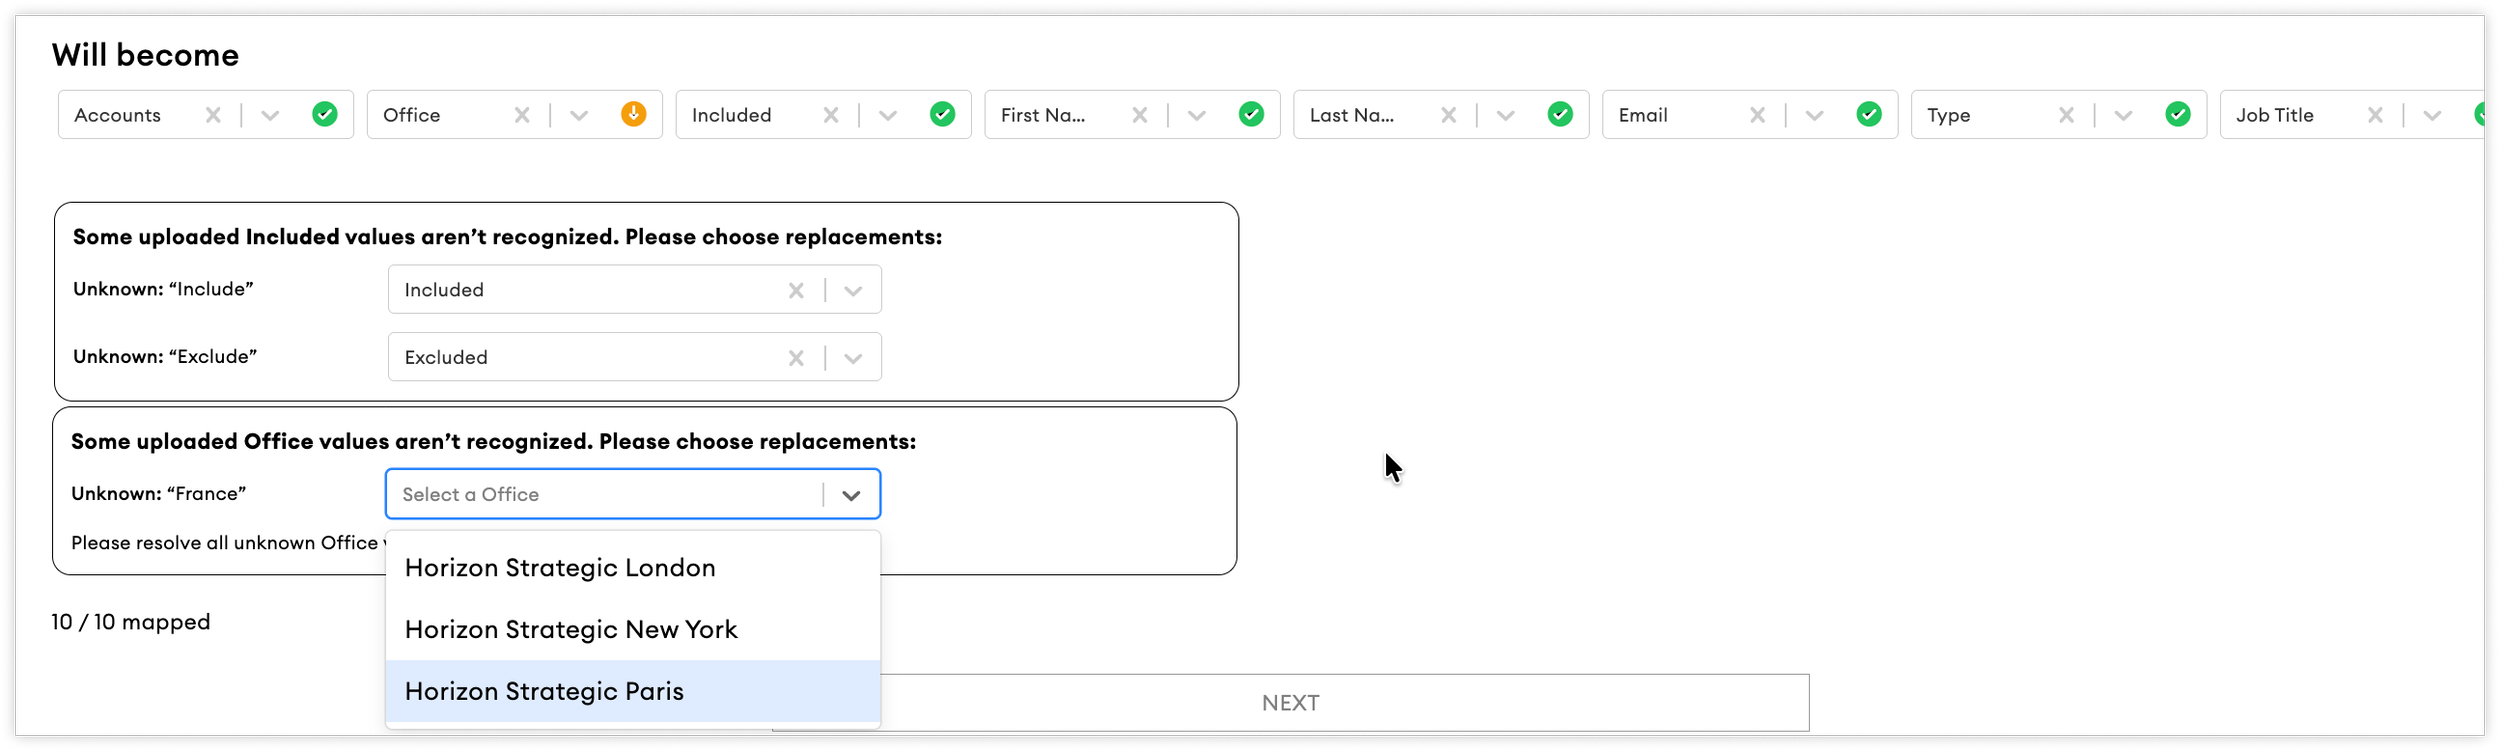
You may see an orange arrow icon within a mapped column. This indicates that one or more values in the column do not match the available options within the platform.
For example:
An office name does not exist or is spelt differently
A contact type is invalid
A language value is not recognised
When this occurs, review the Unmatched Values section below the table and select the correct value for each unmatched entry.
⚠️ Depending on your organisation's configuration, the columns displayed may differ slightly from those shown in this guide.
Step 3: Review Your Changes
Once all columns and values have been mapped successfully, click Next to continue. Before importing your data, you'll see a summary of the proposed changes.
Updated Accounts or Contacts: Existing accounts and contacts that will be modified.
New Accounts or Contacts: Accounts and contacts to be added to the platform.
Ignored Accounts or Contacts: Rows that cannot be imported due to validation issues.
Common reasons for ignored Accounts or Contacts include:
Missing required information
Invalid email addresses
Invalid field values
Attempting to add records to accounts, markets, or offices you do not have access to
Review Summary
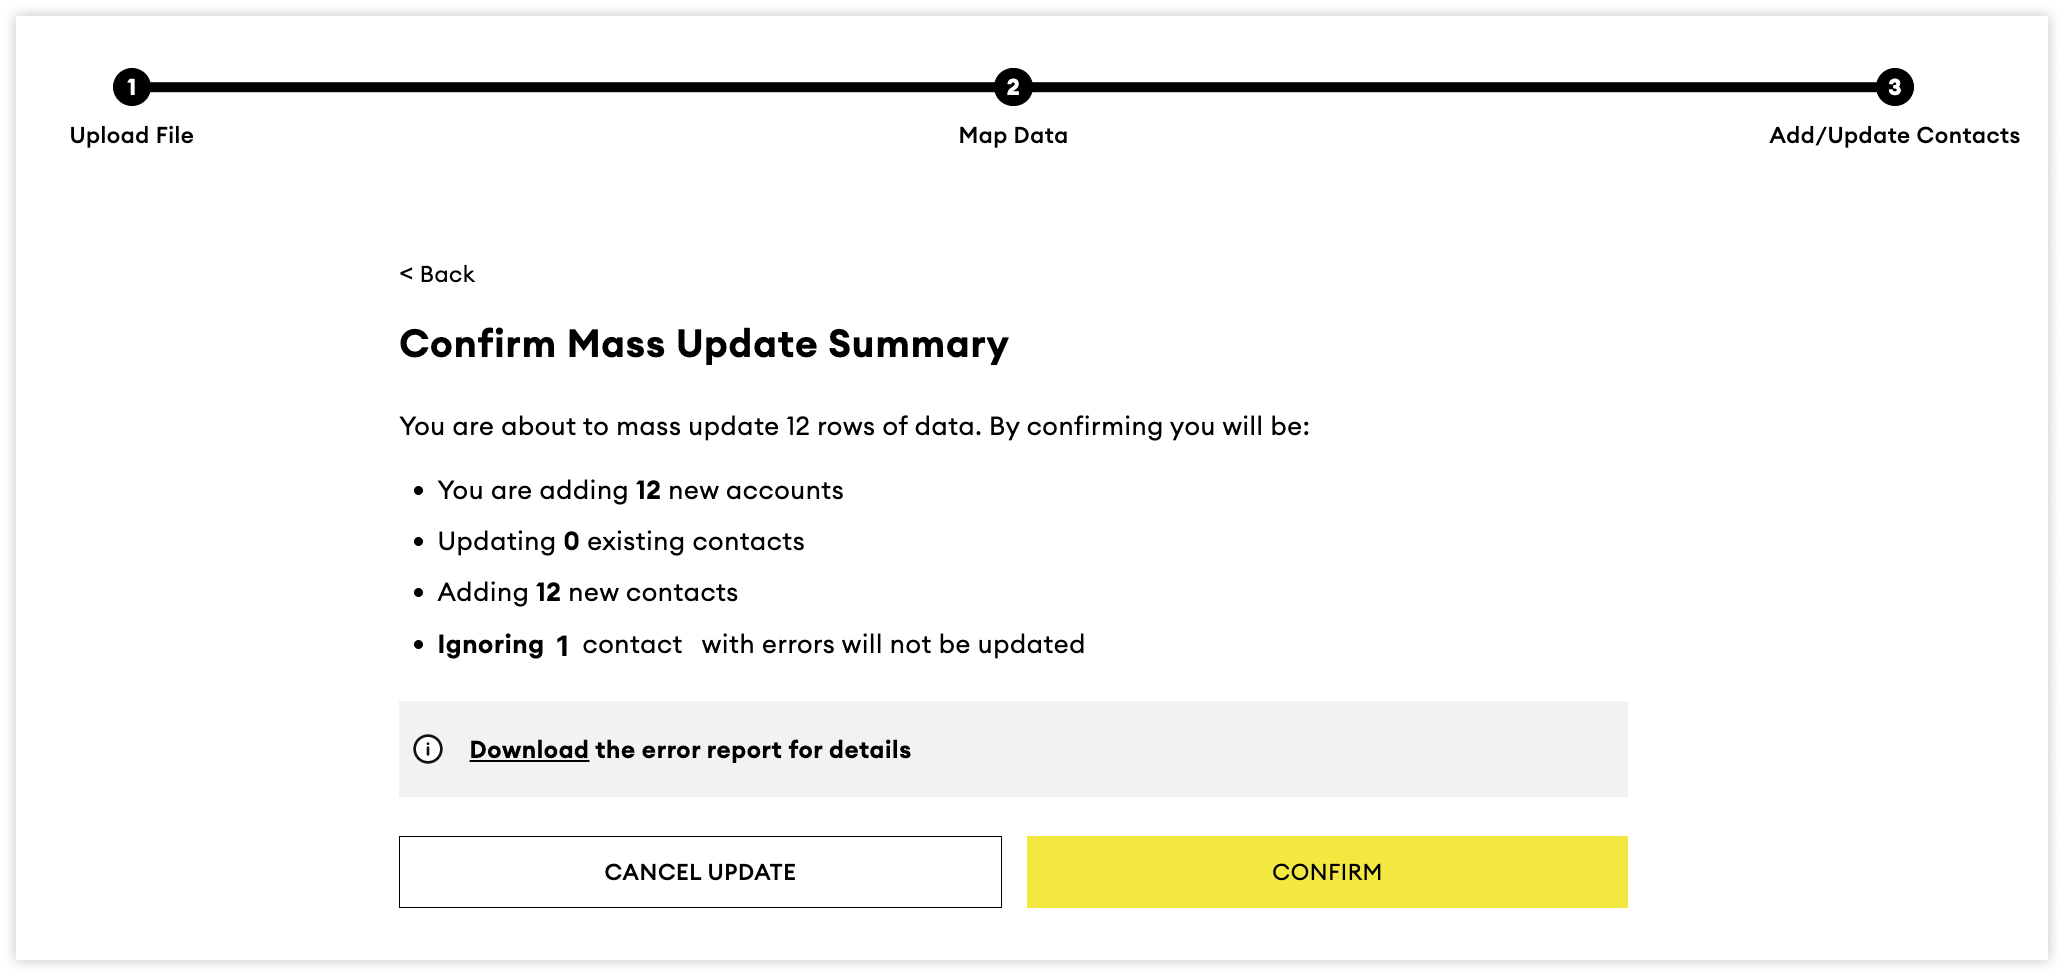
Before completing the update, you’ll see a summary:
Updated Contacts – existing contacts that will be changed.
New Contacts – new entries that will be added.
Ignored Contacts – rows are skipped due to errors, such as:
Missing required information (e.g., first or last name).
Invalid email formatting.
Attempting to add to an account/office that doesn't exist on your account.
Error Reports
If any rows are ignored, you can download an Error Report for a detailed breakdown of the issues.
For small numbers of errors, you may choose to continue with the valid records and correct the remaining rows later.

Step 4: Confirm and Finish
Once you're happy with the summary:
Click Confirm
Allow the import process to complete
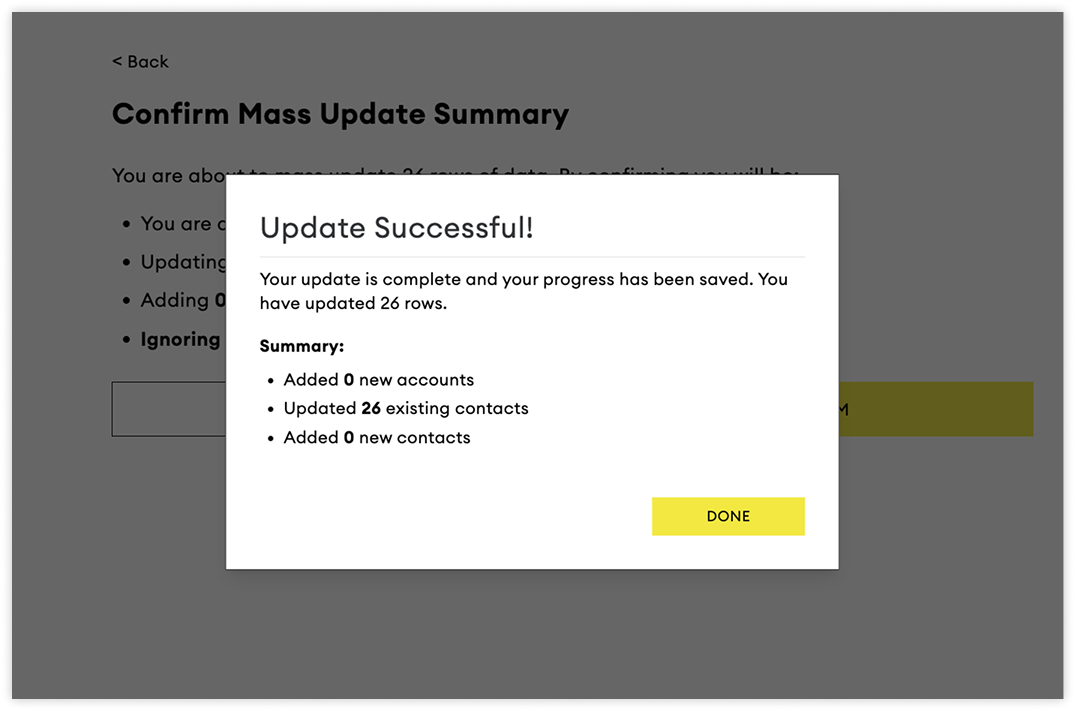
You'll then see a success message summarising the changes that were applied.
All updates are automatically saved.
Still need help?
If you experience any issues or need assistance preparing your data, please contact our support team.