
Set Up Your Survey
Follow this step-by-step guide to create, schedule, and launch your survey.
JUMP TO: NAMING | DATES | QUESTIONS | SIGNATURES | ACCOUNT & CONTACTS | SCHEDULE
TIP: Before beginning the survey creation process, we recommend that you update your accounts and contacts with anyone you’d like included in the survey.
1. Name your Survey
After clicking ‘Create New Survey, ’ the first thing you’ll be asked to do is to give your survey a name. The survey name is for internal use only and will not be visible to survey recipients. Choose a name and format that makes it easier for you and your team to retrieve and track related surveys.
Examples:
Q4 2026 – All Accounts
Q4 2026 – [Account Name]
2026 Pulse Check – [Account Name]

💡 Best Practice:
We recommend including all accounts you want feedback from within a single survey where possible. This makes it easier to compare performance, track trends over time, and identify patterns across accounts in the analytics dashboard.
2. Select your Survey Dates
Your survey dates determine when contacts will receive emails containing their unique survey links. You can schedule up to four email sends, each containing a unique survey link that allows contacts to respond.
INFO: Surveys must be scheduled at least 24 hours in advance

Email Invitations and Surveys
Email Cadence
When you select a survey start date, we will automatically populate the remaining email dates using our recommended cadence.
If these dates do not suit your needs, you can adjust them before scheduling. For example, if a public holiday falls within one of the markets you are surveying, you may wish to reschedule emails to a time when contacts are more likely to respond.
Time Zones
By default, survey emails are sent at 7:30 AM in the contact's local time zone.
If you are surveying contacts across multiple markets and time zones, emails will be delivered at different times based on each recipient's location.
INFO: Once your survey has been successfully scheduled, you will receive an email confirming your survey dates and email schedule. We recommend communicating and keeping your customers informed and expectant of receiving these emails.
Each survey email uses slightly different wording but follows the same basic format:
Explains the purpose and importance of the survey
Provides the recipient with their unique survey link
Gives recipients the option to opt out of future survey communications
Thank them for their participation
Language Settings
Survey invitations and survey forms are automatically sent in the language configured for each contact.
Responses will be available on the dashboard in both:
The original response language
An English translation (where applicable)
3. Choose your Survey Questions
Your survey questions are at the heart of the feedback process and help determine your Relationship Rating.
The TRR (Total Relationship Rating) question set is included in all surveys by default across all subscription tiers.
Each TRR question set costs 1 credit per contact.

Survey Subject
The survey subject helps respondents understand who the survey is about. In most cases, we recommend using your business name. However, you may choose a more recognisable or specific name, such as a product, service, or brand that your customers are familiar with.
For example, if your business is called Horizon Strategic, respondents will see questions such as:
On a scale of 1–10, where 1 is low and 10 is high, how likely are you to recommend Horizon Strategic to a friend or colleague?
What makes you feel this way about Horizon Strategic?

Extra Questions
Extra Questions allow you to gather additional insights about your client relationships beyond the standard TRR question set.
To use Extra Questions, enable the feature during survey setup and select the additional questions you would like to include alongside the required TRR questions.
INFO: The Extra Questions feature is available to Silver and Gold tier customers only. If you would like to upgrade, please contact your Verity Agency Partner or email our support team.

Question Types
We currently support two types of survey questions:
Rating Questions
Respondents are asked to provide a score between 1 and 10.
Feedback Questions
Respondents provide open-text feedback in their own words.
When feedback is received, it is analysed and categorised into themes. These themes help identify patterns, strengths, opportunities, and areas requiring attention across your client relationships.

Credits
Adding Extra Questions increases the number of credits used for each contact based on the credit value shown in the Credit column.
Examples
Future Fit Question = 1 Credit
TRR Question Set = 1 Credit
Future Fit Question = 1 Credit
Total Cost = 2 Credits per Contact
Improver Question = 0.5 Credits
TRR Question Set = 1 Credit
Improver Question = 0.5 Credits
Total Cost = 1.5 Credits per Contact
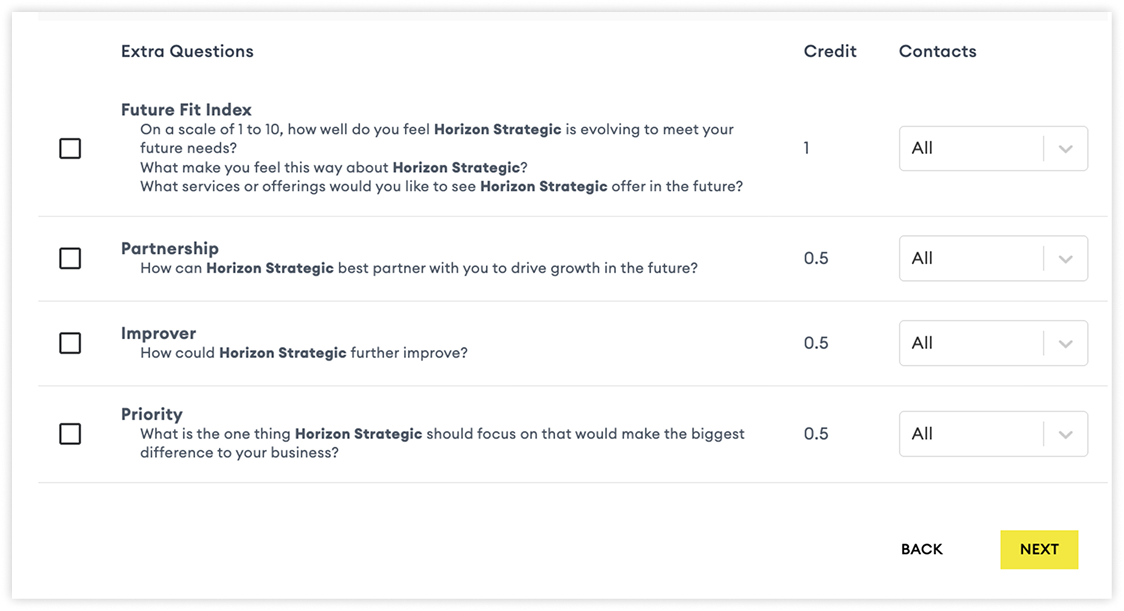
Selecting Who Receives Extra Questions
Use the Contact column to determine which contacts should receive each Extra Question.
You can choose from:
All Contacts
Every selected contact will receive the question.Critical Contacts (CC) Only
Critical Contacts are key decision-makers who have direct influence over the business relationship. This may include leadership team members and stakeholders with the ability to influence contracts, budgets, or strategic decisions.Primary Contacts (PC) Only
Primary Contacts are day-to-day relationship owners who interact regularly with your team but typically have less influence than Critical Contacts.Critical & Primary Contacts
The question will be sent to both Critical Contacts and Primary Contacts.
The following Accounts & Contacts stage allows you to select who will be included in the survey. Doing this will give you a more accurate idea of how many credits the survey will cost.
4. E-Mail Signatures
Choosing your email signatory is an important step in the process.
Selecting the right person for the survey you’re setting up can help improve your response rates. We’ve found that choosing somebody that all or most of the contacts you’re surveying recognise make it more like for them to respond to the survey.
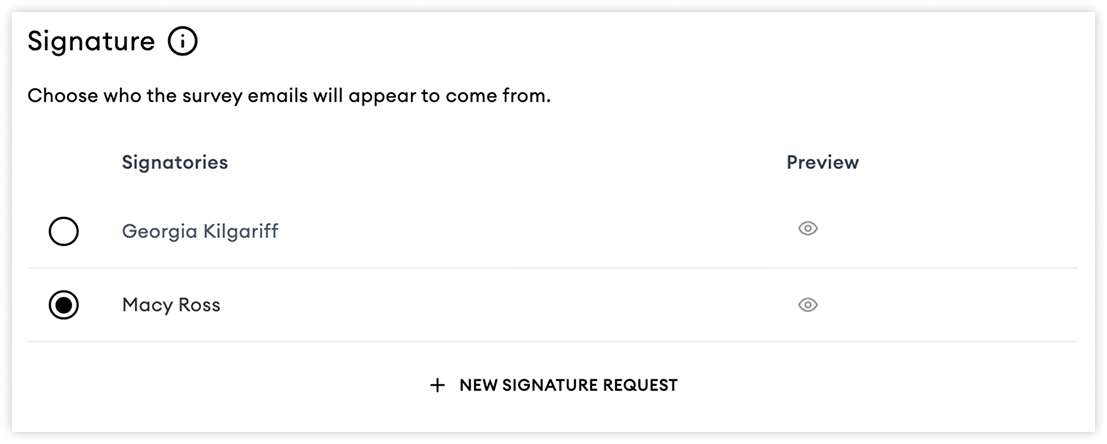
You can preview your existing signatures using the eye icon.
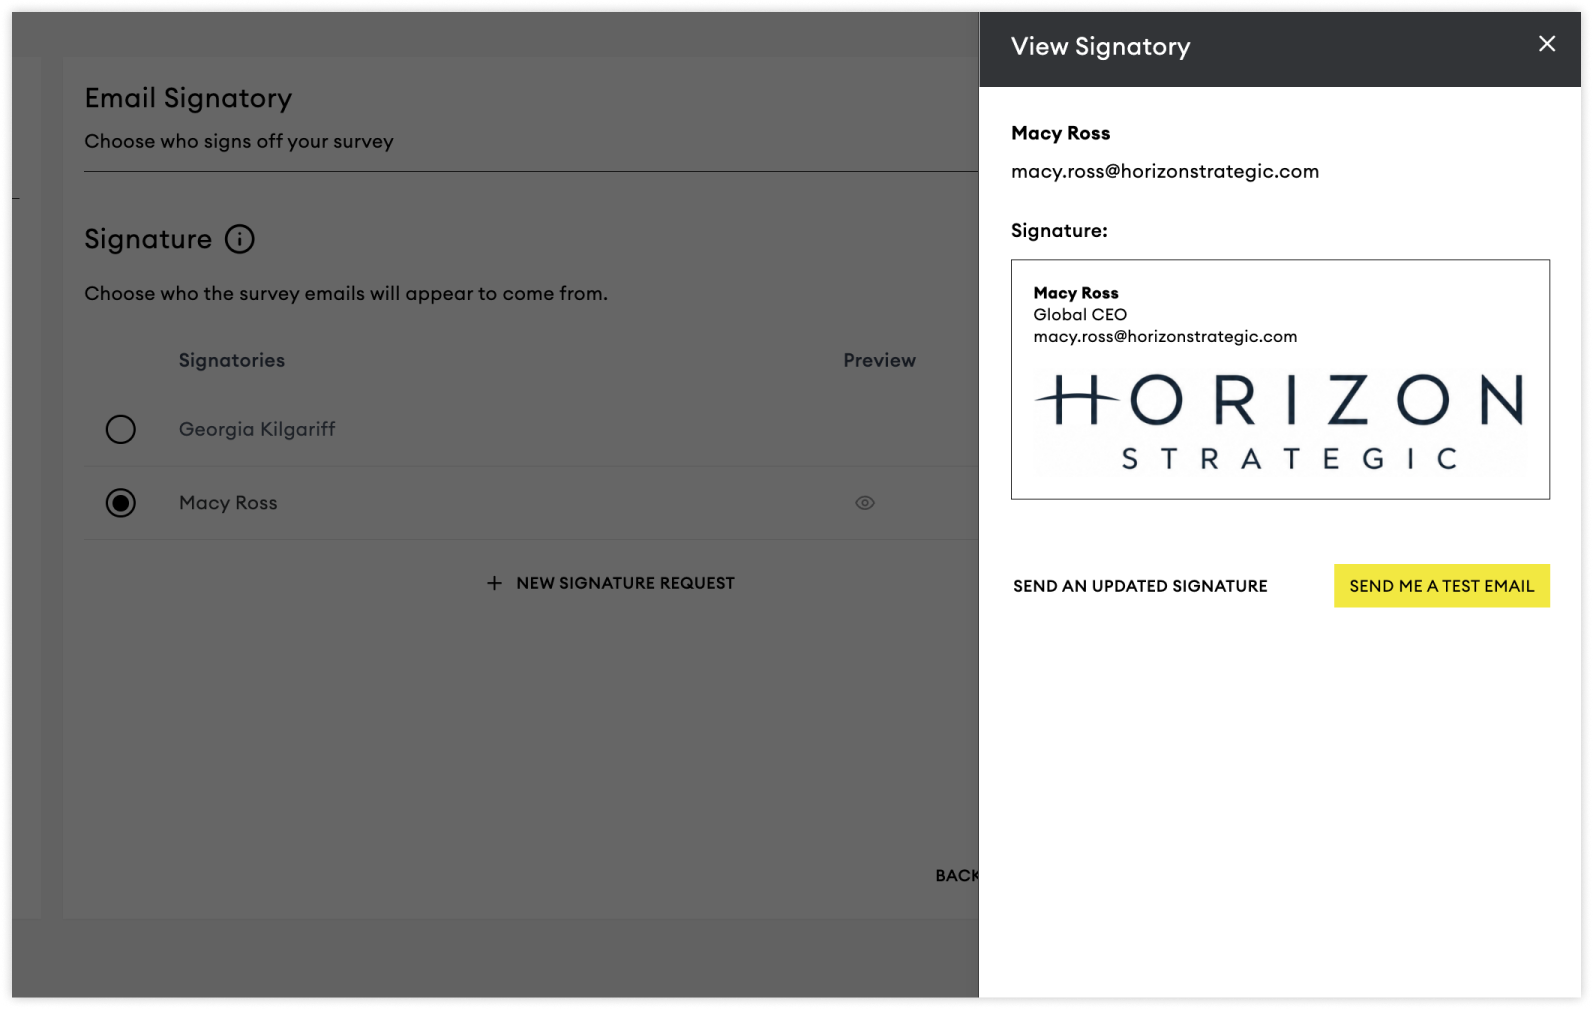
New Signatures
Signatures are currently set up when you are onboarded to the platform.
Any changes or additions to your selection need to be sent to our support team.
You can learn more about e-mail signatories here.
5. Accounts & Contacts
Once you’ve determined your name, dates, questions and signatories, it’s time to choose which of your customers you’d like to survey.
The system is flexible, allowing you to survey the accounts, subsets of accounts, and/or markets. Surveys will be sent at 09:00 in each account and market’s local time zone.

Choosing who to include in your survey is simple. Select the checkbox next to each account and contact you would like to survey.
As you make your selections, your credit usage will automatically update in the bottom-left corner of the screen, allowing you to track how many credits your survey will consume.
Understanding Credits
Most contacts use a standard number of credits. However, contacts assigned additional survey questions may require more credits.
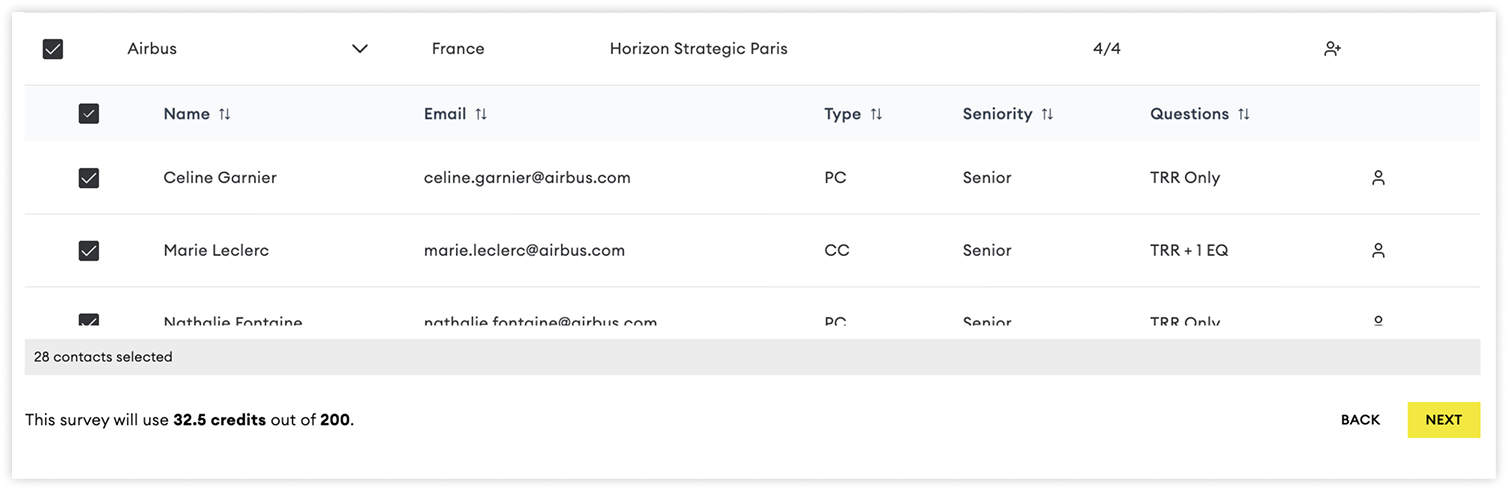

You can also search across any column by switching to the List View and using the search bar.
Why We Recommend Updating Accounts and Contacts First
You can make last-minute additions during survey setup by clicking Add Account to create a new account or the Add Contact icon to add a new contact.

However, if you need to edit an existing account or contact, you'll need to navigate to the Accounts & Contacts page. Any unsaved progress made while setting up your survey will be lost.
💡 Best Practice: Review and update your accounts and contacts before creating a survey to avoid interruptions and ensure all recipient information is up to date.

Once you’ve chosen who you’d like to include in the survey, you click ‘Next’ to the final step, where you can review and schedule your survey.
6. Review and Schedule Your Survey
Before scheduling, review all of your selections, including the accounts, contacts, survey settings, and credits that will be used.
Once your survey has been scheduled, you can continue to make changes up until the survey launch date.
After scheduling, you and your team will receive a confirmation email containing your survey details and mailing schedule.

Cancelling a Survey
If you cancel a survey before the first email is sent, all associated credits will be returned to your account.
If survey invitations have already been sent and you choose to end the survey early, the credits used for that survey cannot be reinstated.
💡 Tip: Double-check your survey settings and recipient list before scheduling to avoid using credits unnecessarily.