Accounts and Contacts
The Accounts & Contacts page is your central hub for managing customer data, including the accounts, markets, and contacts you want to survey
JUMP TO: SAVING | ACCOUNTS | CONTACTS | FIELDS | DOWNLOADING | MASS UPDATING →
💡 Best Practice: Always review and update your customer data before creating a survey. Once you begin the survey creation process, you won't be able to edit existing accounts or contacts without leaving the survey setup flow.
Viewing Your Data
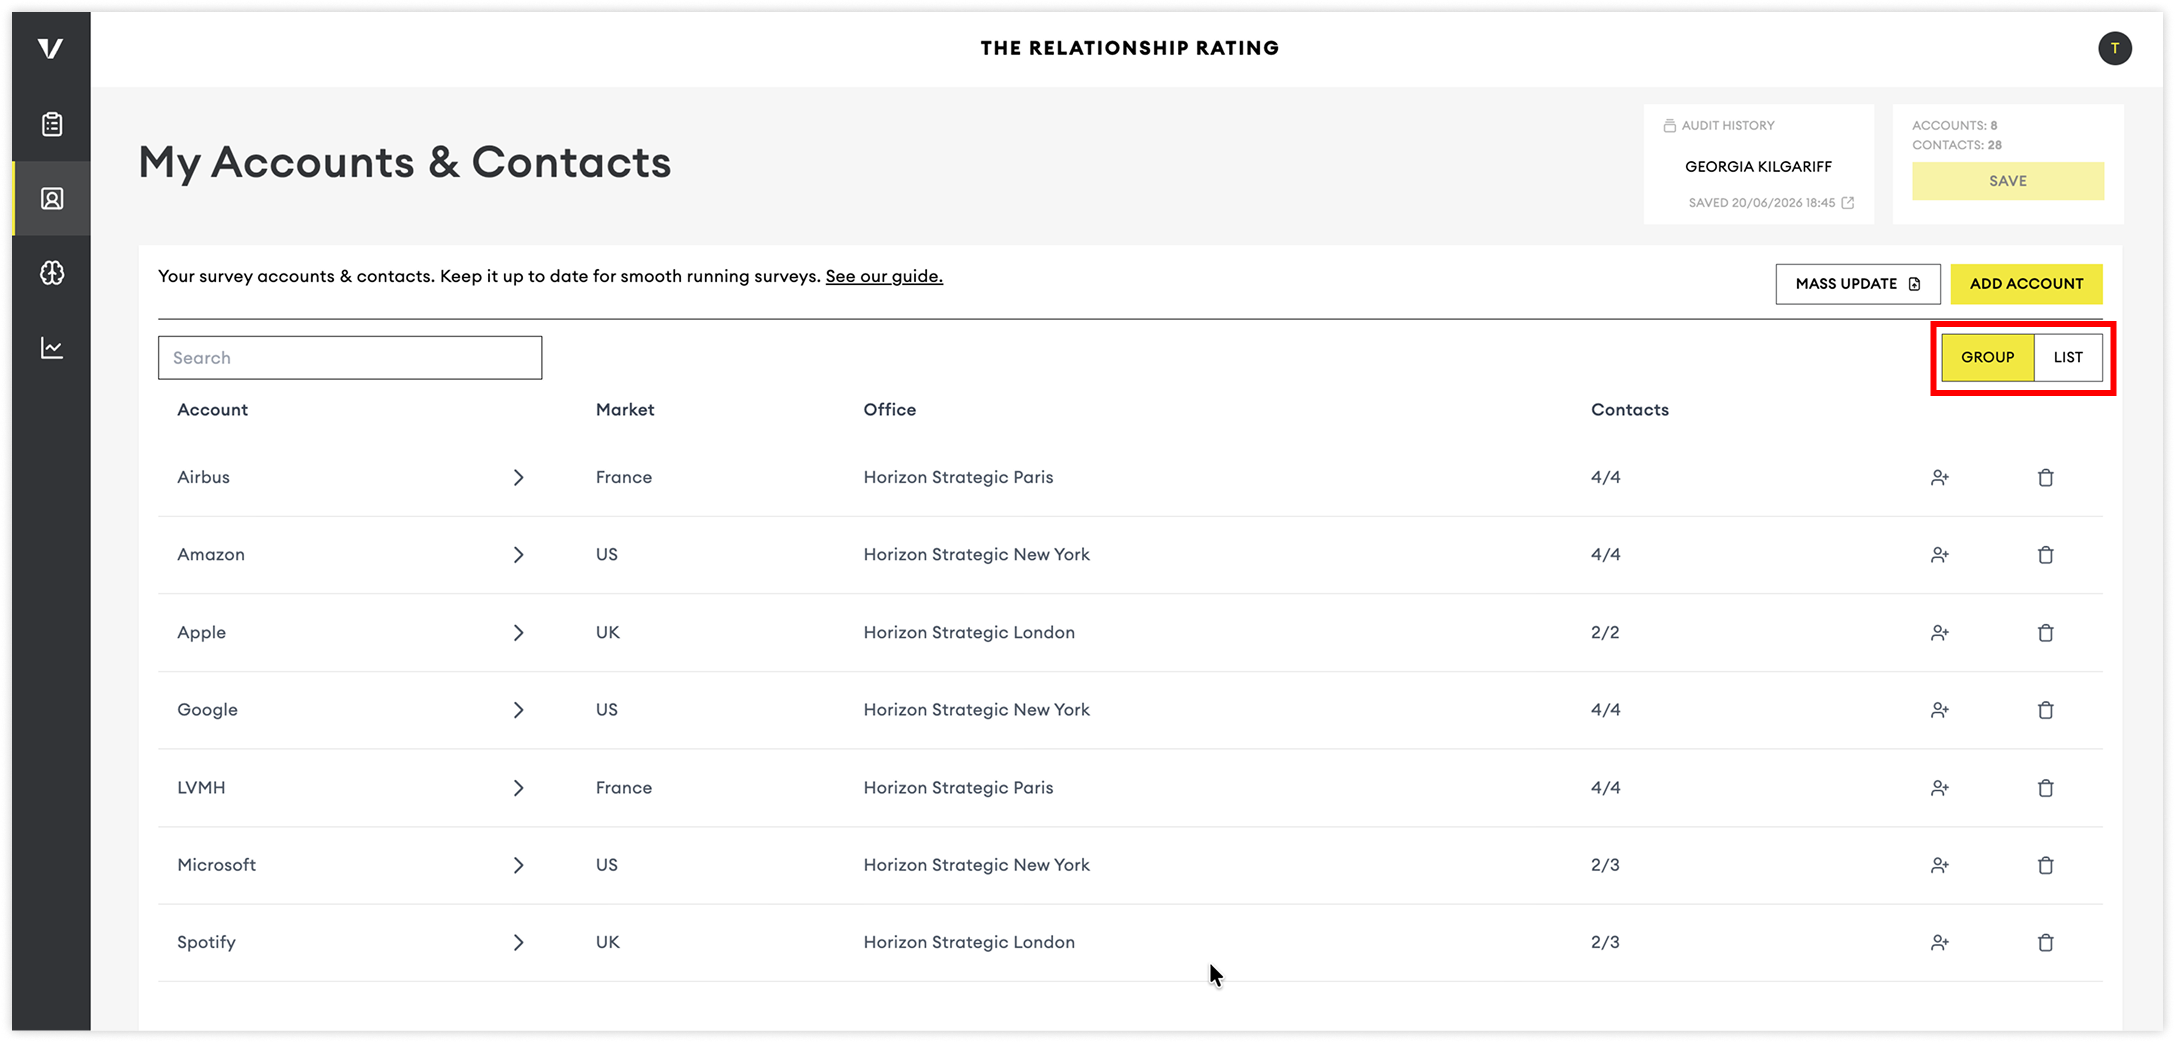
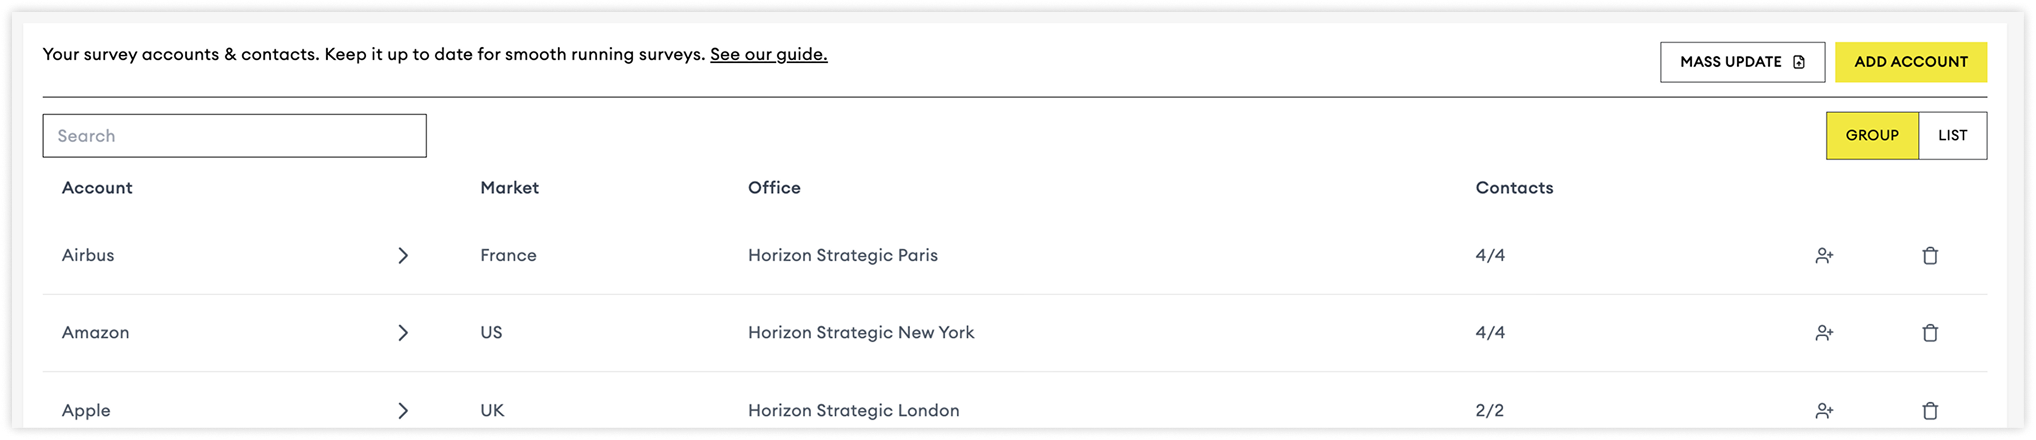
The main table displays all of your accounts and contacts. Use the view toggle to switch between:
Group View: Accounts are displayed as collapsible rows, with associated contacts nested beneath them.
List View: All contacts are displayed in a single searchable list.
💡 Tip: Using the search in list view allows you to search all columns.
Saving Changes & Audit History
Whenever changes are made, the account and contact totals at the top of the page will turn red, indicating that you have unsaved changes.
To save your updates:
Click Save
You’ll see a summary of your changes
Confirm your updates
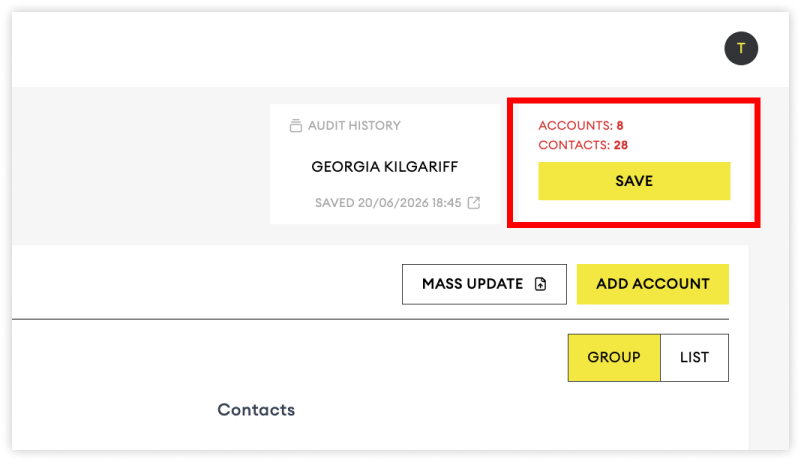

💡 Best Practice: Save your work frequently to avoid losing changes.
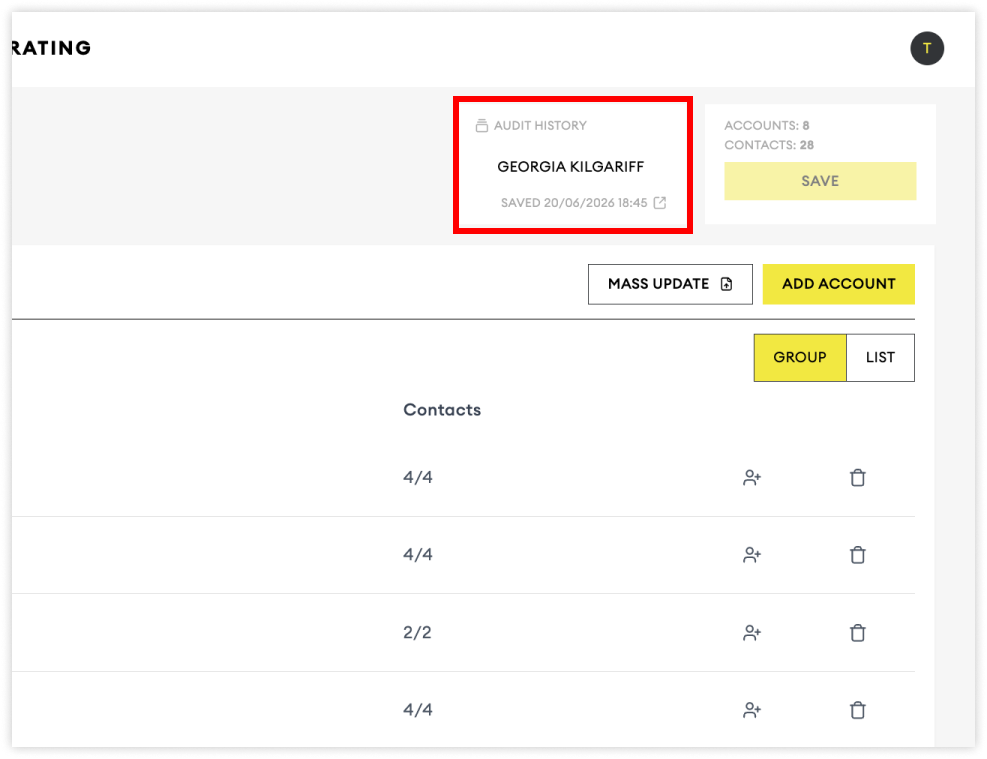
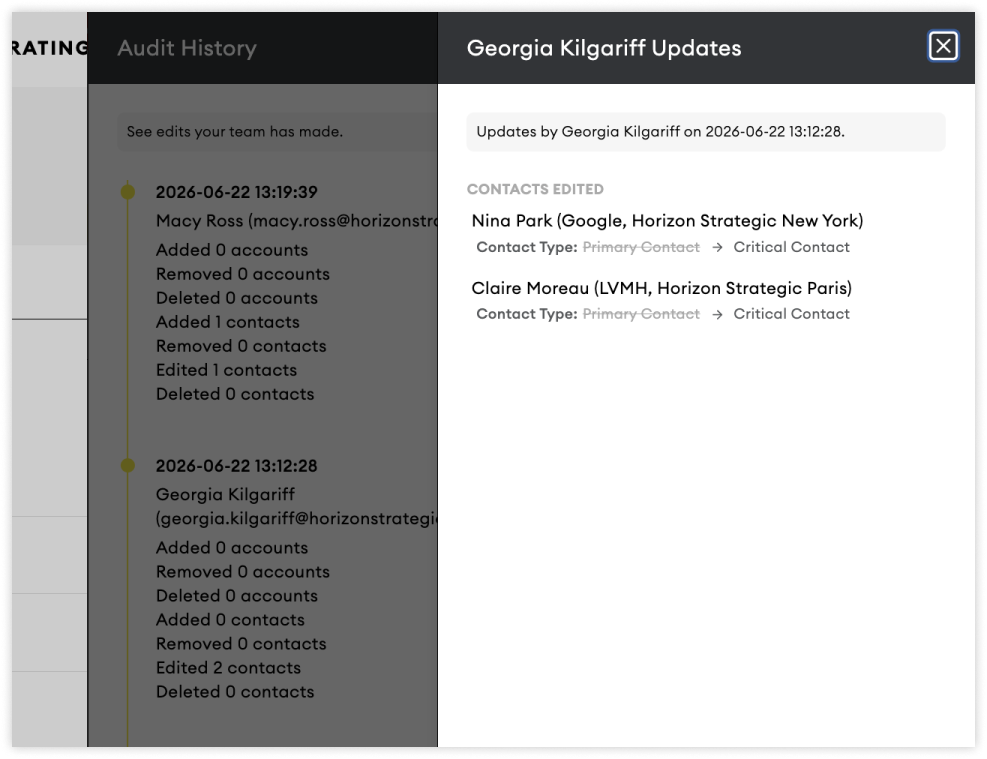
View Audit History
To view changes made by you or your team:
Click Audit History at the top of the page
Select the expand icon to view details
The audit log provides a history of account and contact changes across your organisation.
Adding Accounts
During onboarding, you'll provide a list of the markets and offices (cities) your organisation operates in. These determine the options available when creating new accounts.
If you need to add additional markets or offices, please contact the support team.
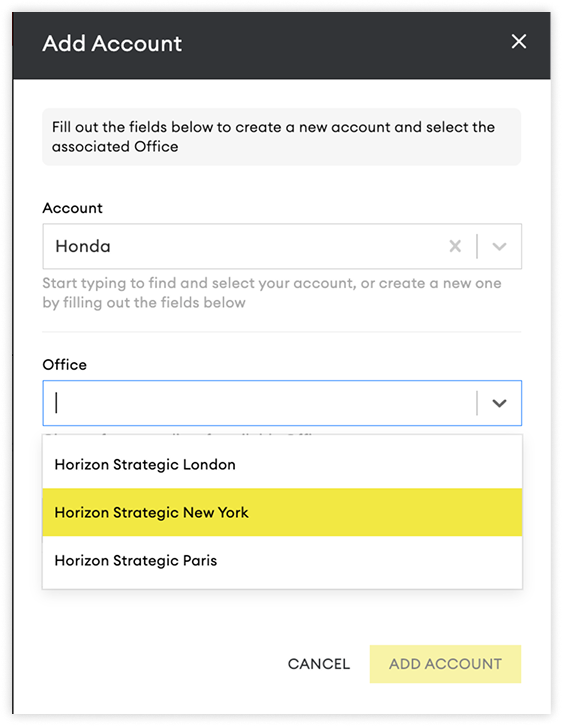
To Add an Account
Click Add Account in the top-right corner of the table.
Search for an existing account using the Account field. If the account doesn't exist, create it directly from the same field by clicking ‘Create new account’ in the dropdown.


Next, select an Office; this tends to be the city your business is located in. The corresponding Market will automatically populate.

TIP: Need to add multiple accounts at once? Use the Mass Update tool to upload a .csv or .xls file instead.
Lastly, click ‘Add Account’
Adding Contacts
Contacts are added to accounts individually using the Add Contact form.
⚠️ Please Note: You must be in Group View to add contacts to an account.
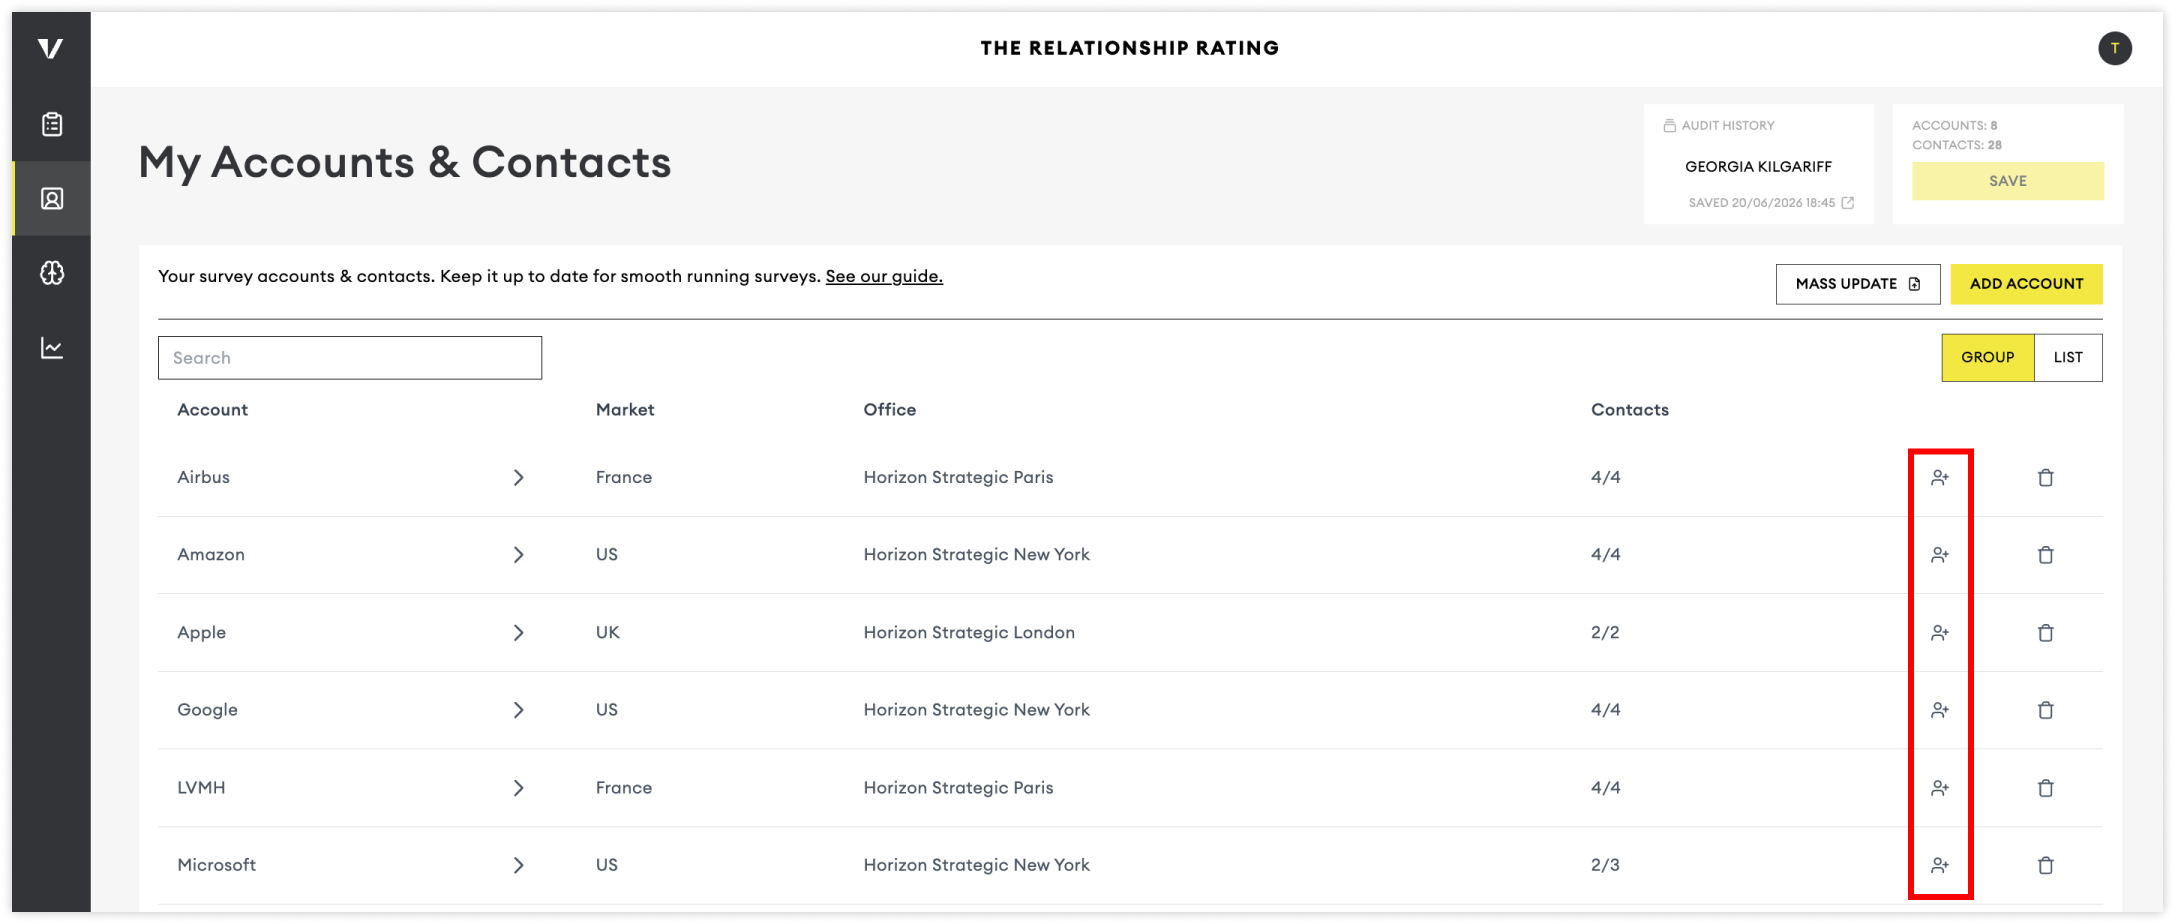
To Add a Contact
Click the Add Contact button next to the relevant account.
Enter the contact's email address. The platform will check whether the contact already exists.
If the contact is new, click Create new contact in the drop-down and complete the remaining contact fields before saving.
Existing Contacts
Enter the contact's email address, and the platform will check whether the contact already exists.
If the contact is already in the system, their details will be automatically populated.
If the contact already exists on your account list, the platform will prevent you from creating a duplicate record. To make changes to an existing contact, search for them within your Accounts & Contacts list and edit their details there.


💡 Tip: Use List View to quickly search for existing contacts by name, email address, or other contact details.
Contact Fields

Contact Type
Contact Type helps classify stakeholders based on their role and influence within the client relationship. This information can be used for filtering, benchmarking, and trend analysis throughout the platform.
Critical Contact (CC): Key decision-makers who have direct influence over the business relationship.
Examples may include:
Executive sponsors
Senior leadership stakeholders
Budget holders
Contract decision-makers
Primary Contact (PC): Day-to-day relationship owners who interact regularly with your team but typically have less strategic influence than Critical Contacts.
Examples may include:
Account managers
Operational leads
Primary points of contact
Other: Any contact you would like to gather feedback from who does not fit into the Critical Contact or Primary Contact categories.
💡 Team Tip: Agree on a consistent approach to contact classification across your organisation. Consistent tagging leads to cleaner reporting and more reliable trend analysis.
Seniority
Seniority helps categorise contacts by their organisational level.
Senior: Executive leaders and senior decision-makers. (Examples: C-Suite, Managing Directors or Executive Directors)
Middle: Managers and department leaders with operational responsibility. (Examples: Department Heads, Senior Managers or Team Leaders)
Junior: Individual contributors and junior team members. (Examples: Coordinators, Specialists or Associates)
These categories can be used for filtering and identifying trends across different stakeholder groups.
Language
The selected language determines the language used for survey invitations and survey forms. If no language is selected, the market's default language will be applied automatically.
Supported languages include:
Chinese (Simplified)
Czech
Danish
Dutch
English
Finnish
French
German
Hungarian
Italian
Japanese
Korean
Norwegian
Polish
Portuguese
Portuguese (Brazil)
Slovak
Spanish
Swedish
Thai
Turkish
Responses will be available on the dashboard in both the original language and an English translation where applicable.
Downloading Your Data
You can download a copy of your accounts and contacts at any time.
To export your data:
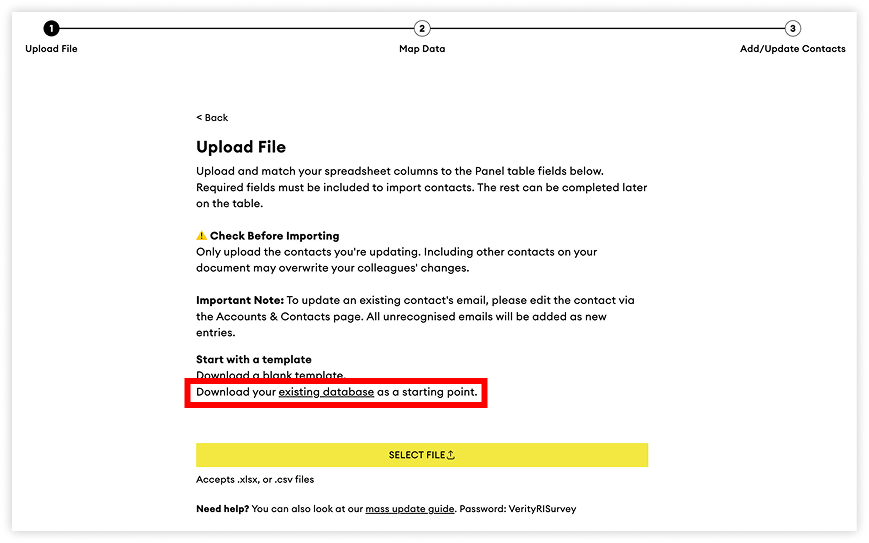
Click Mass Update
Select Existing Database
The exported file can be used for reporting, auditing, or making bulk updates offline.
Mass Updates
Prefer to work in bulk? You can update your accounts and contacts list by uploading a .csv or .xls file using our upload tool.