HOME | ACCOUNTS | PANELS | SURVEY DESIGN | MANAGE RESPONSE | VIEWING RESULTS | ARTICLESHow to Update Your Panel Contacts

1. Getting Started
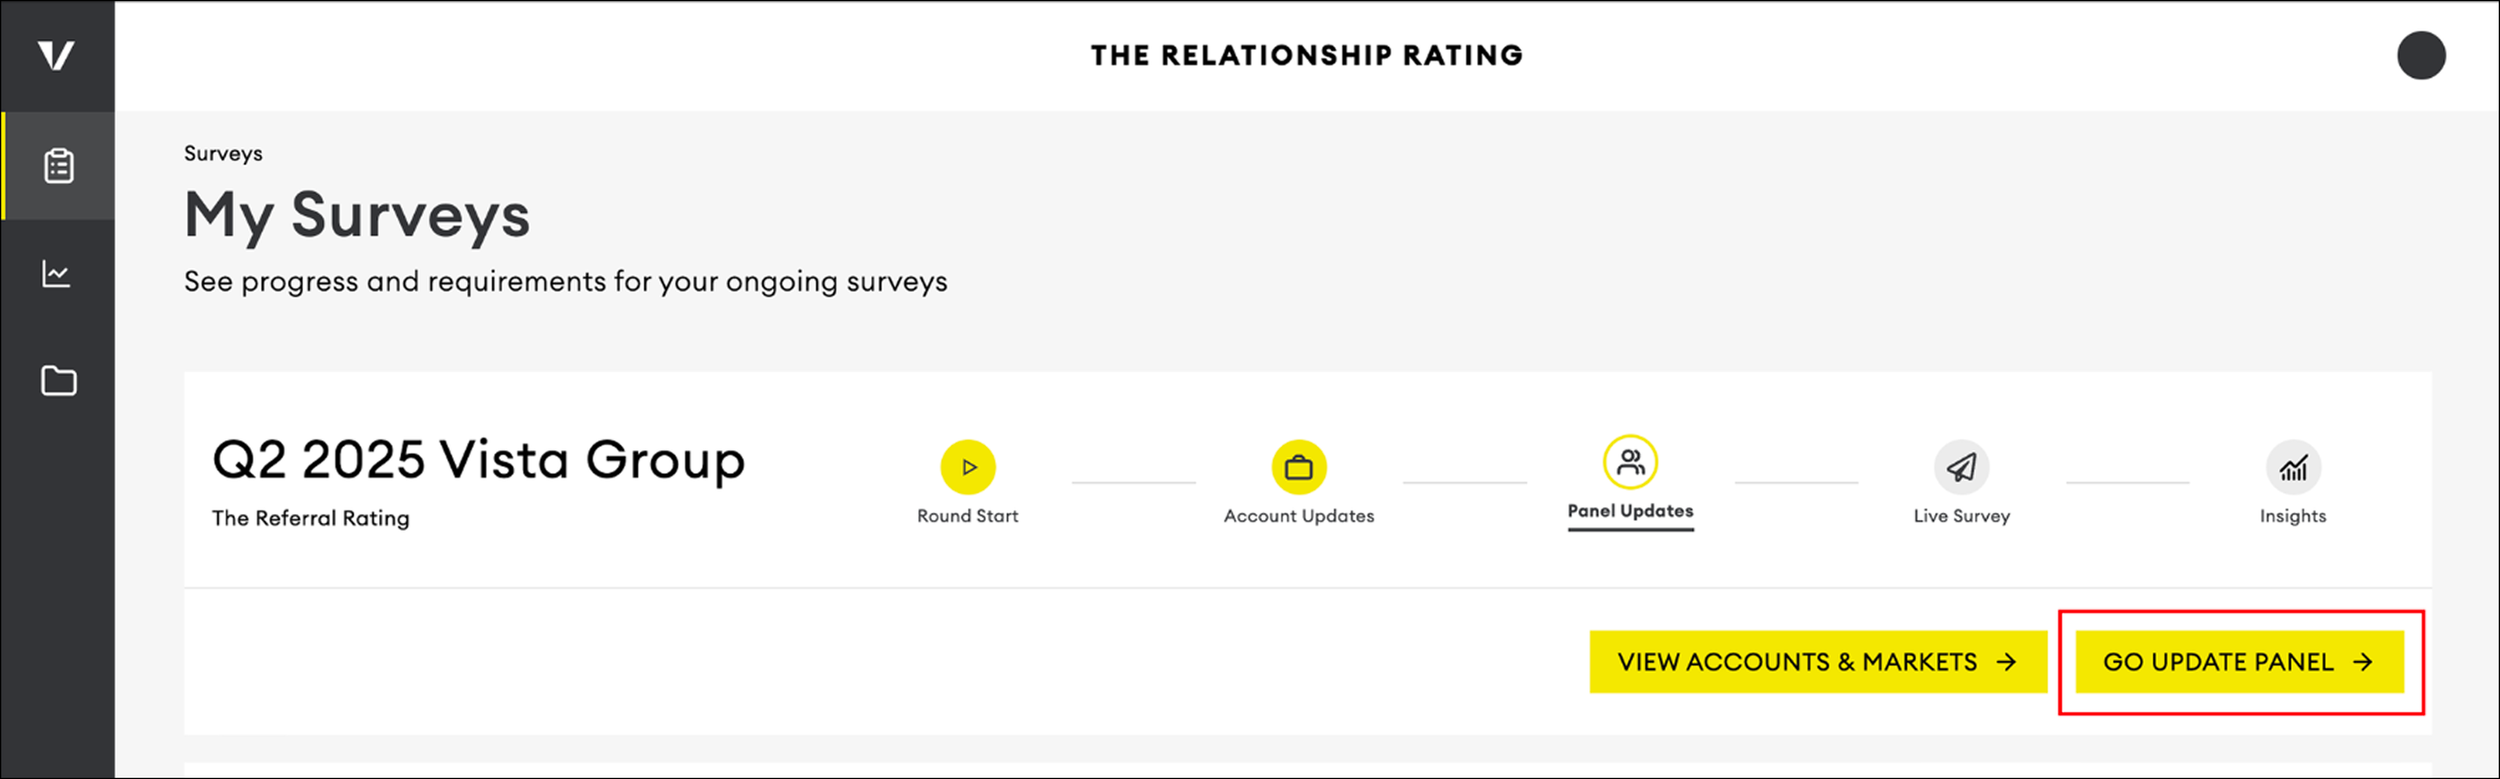
You will receive an email notifying you when it’s time to update your Panel. After you log into the Client Area, click "Go Update Panel" to go to the correct page.
Please note that you will not have the ability to make more edits after the Panel Update stage has closed. If you do not confirm in time, we will use the Panel from the previous round.
2. Making Updates
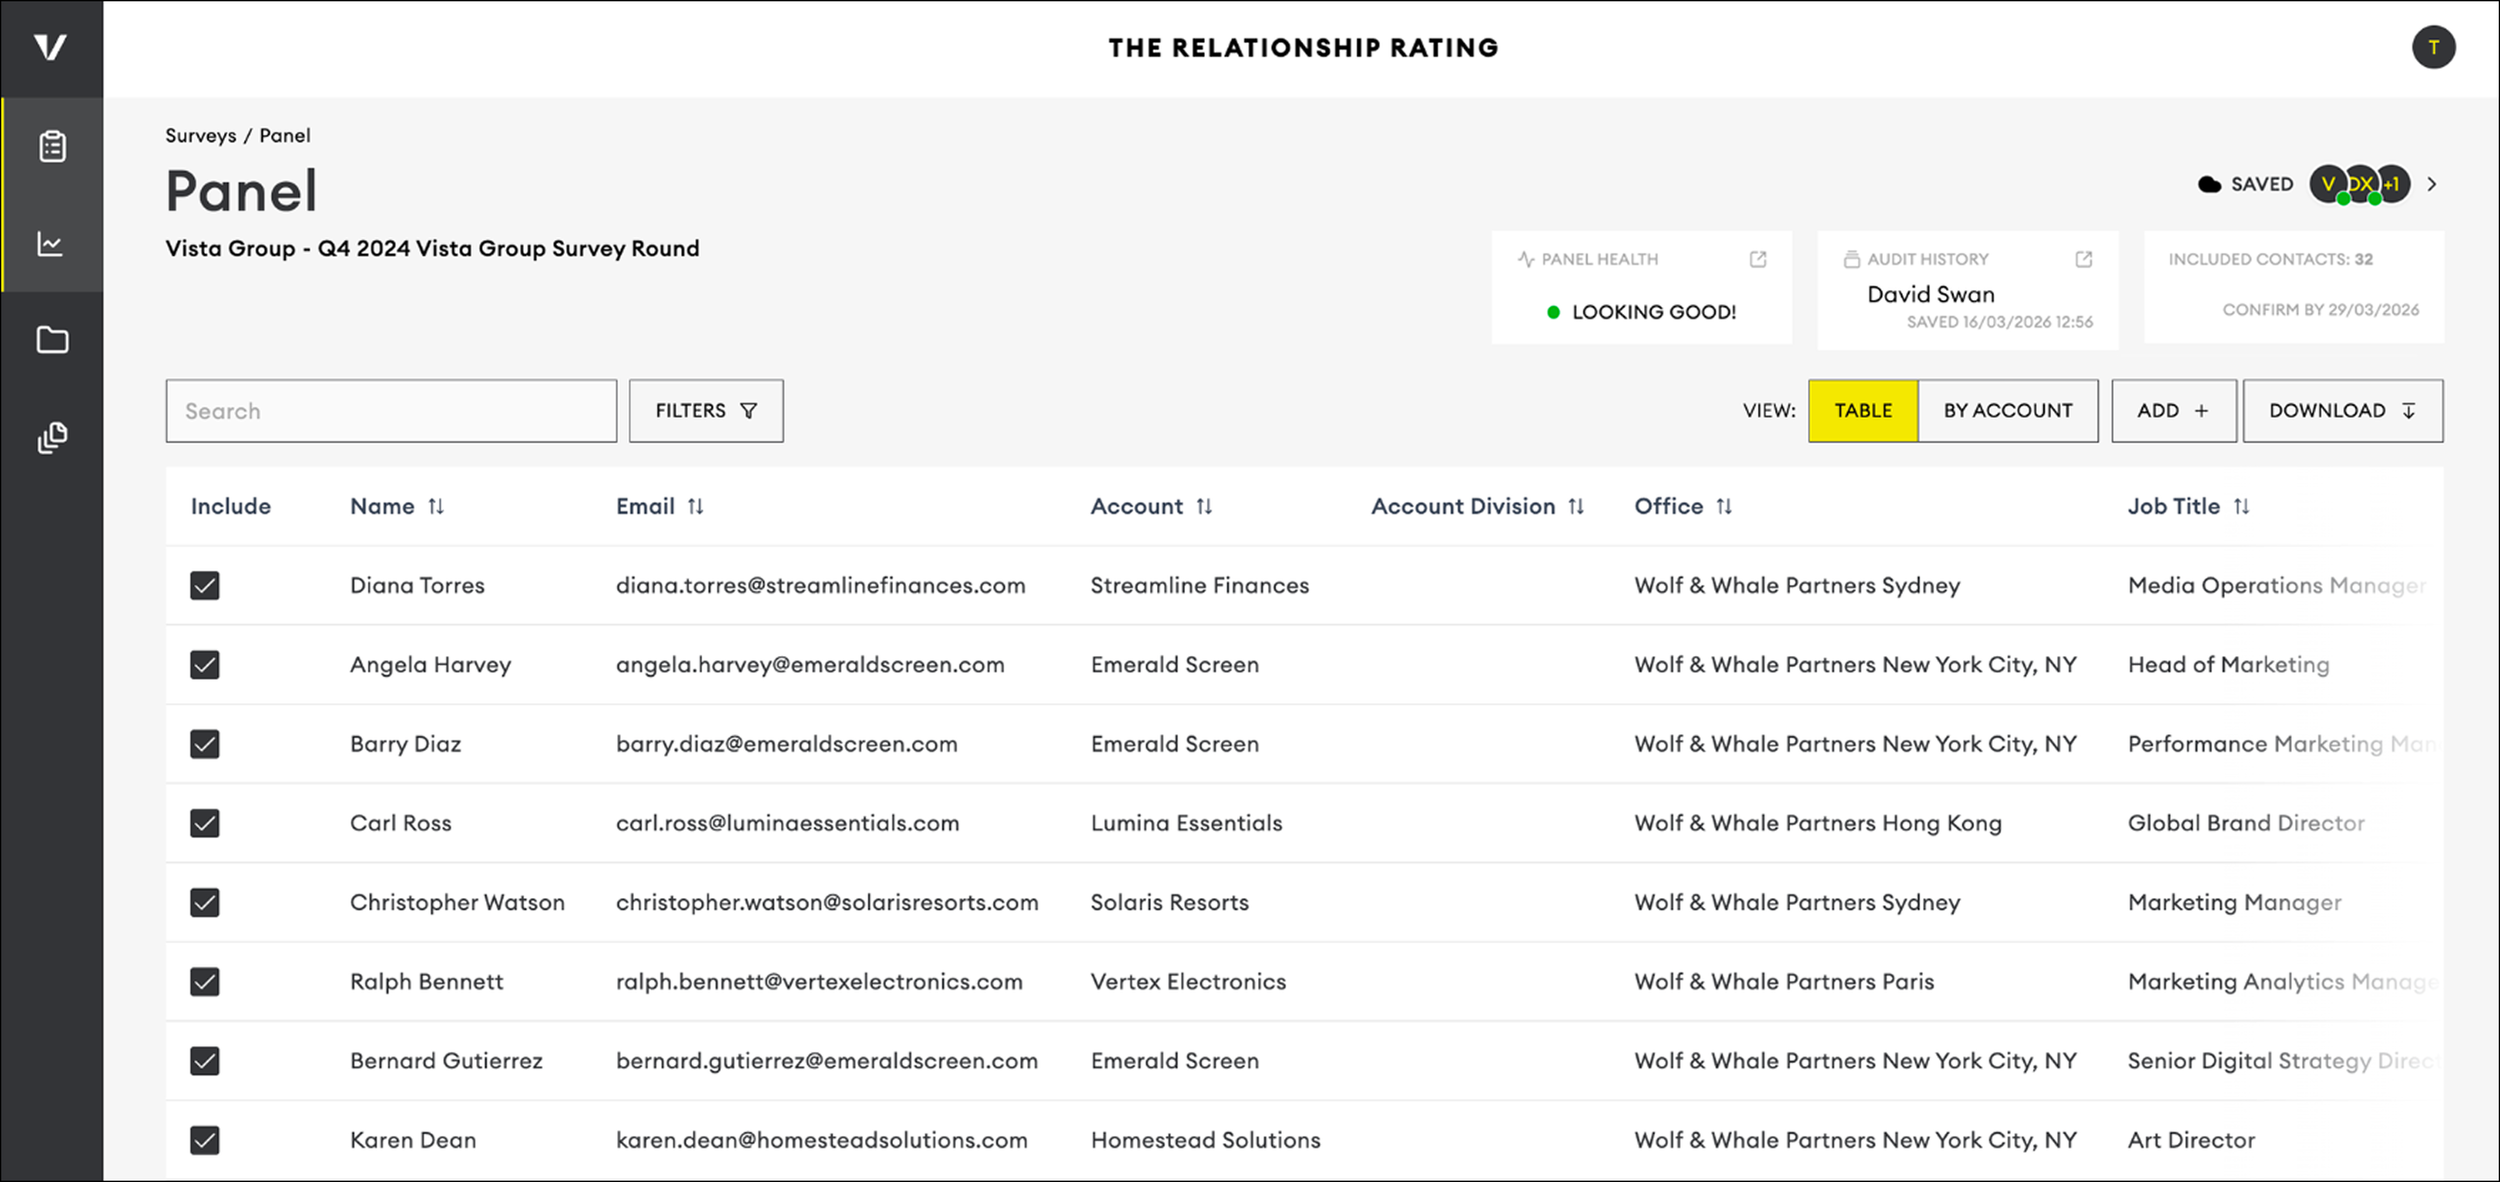
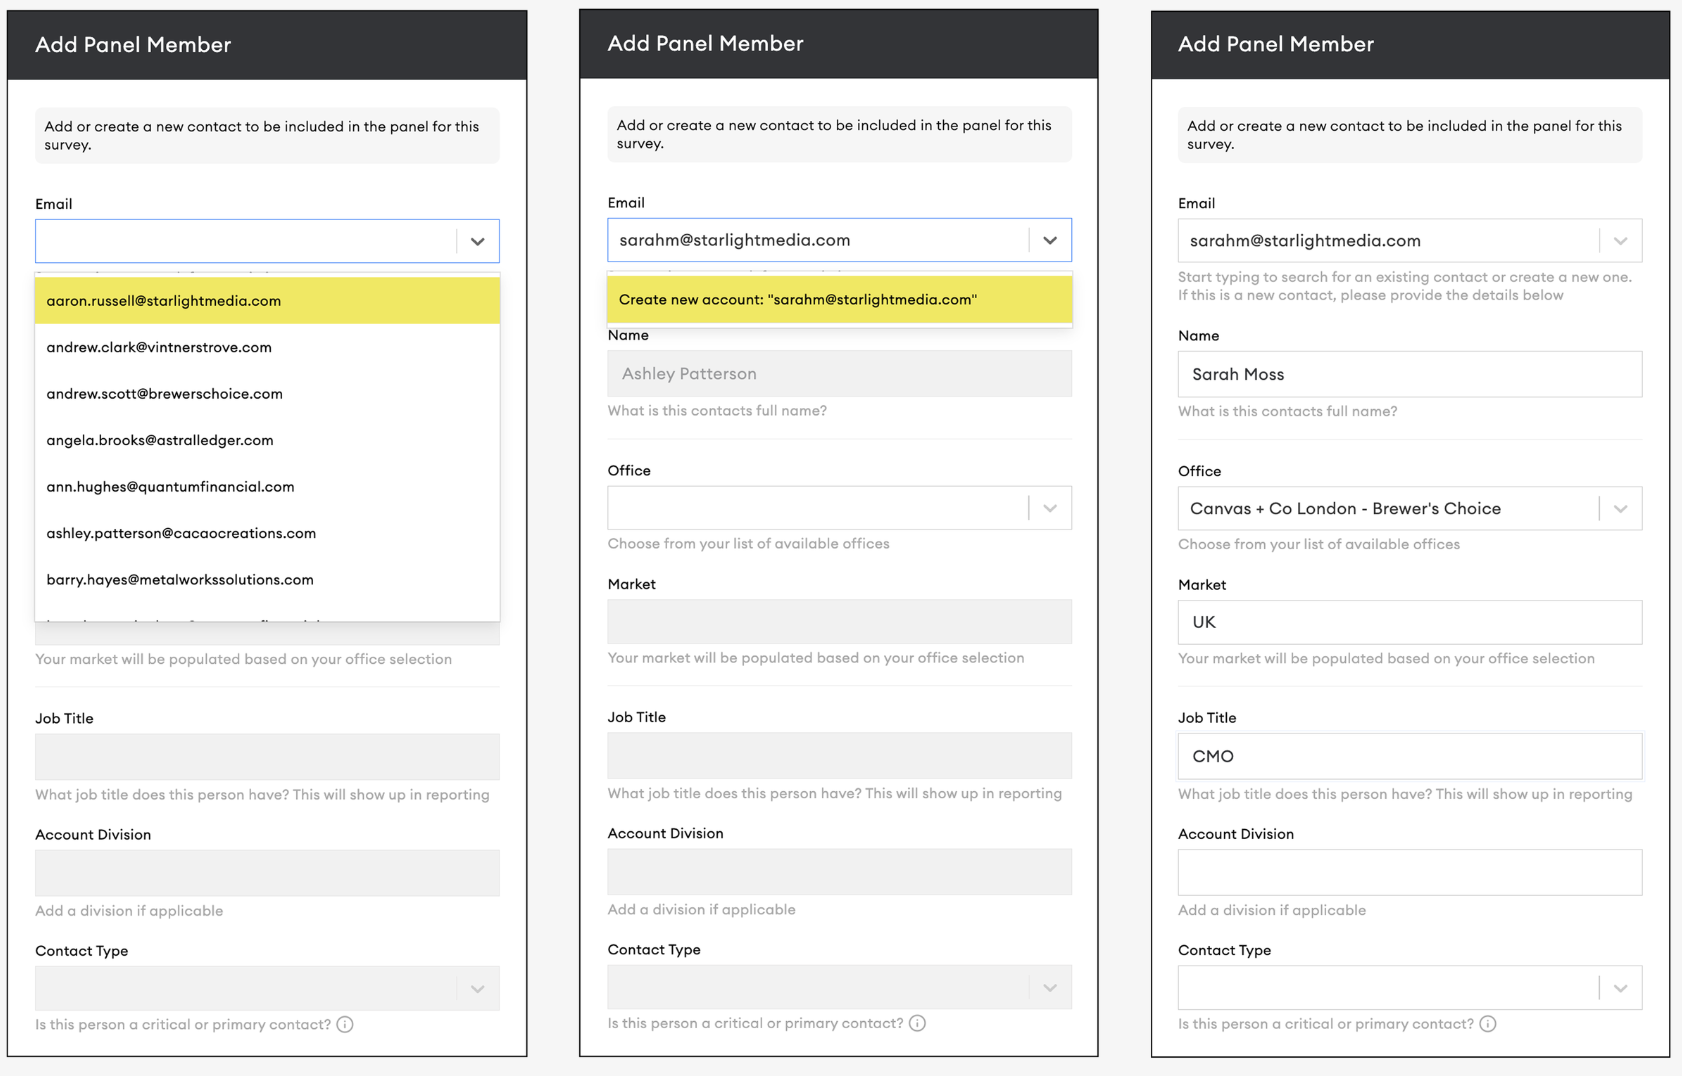
Your Panel is pre-populated with the contacts who were surveyed during the previous round. Once on this page, you can add additional contacts who’ve been surveyed in the past, or create new contacts by clicking the ‘ADD +’ button.
A form will slide out from the right. First enter the contact’s email. If the contact is already in our system, their information will fill in automatically. If it’s a new contact, enter Job Title, Account, Division (if applicable), Contact Type, and Seniority.
Please note: There may be additional fields depending on your industry.
The contact’s language will automatically be selected based on the language we have on file for the Market. If you’d like to send the survey in a different language, you can update it at any time during the Panel Update stage.
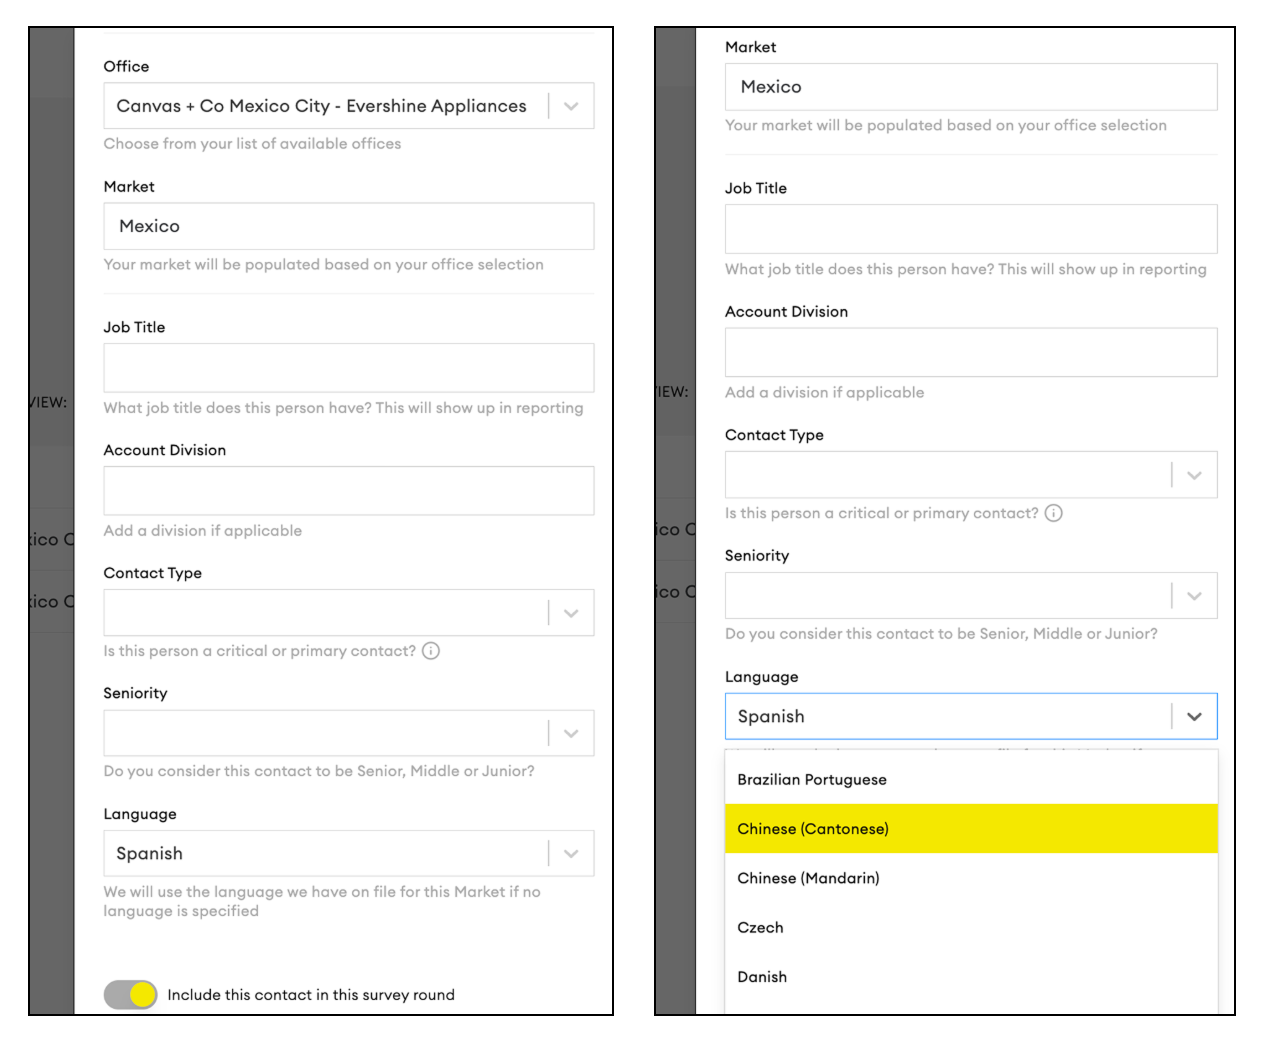
“Type” refers to classes of contacts.
Critical Contacts (CCs): These contacts typically have influence over the contract or other key aspects of your business relationship.
Primary Contacts (PCs): These are the individuals you or your team are most likely in frequent contact with.
Flags
The Flags column helps you spot potential issues at the contact level.
Serial Non-Responders
Contacts who haven’t responded to the previous three survey rounds. You may choose to exclude these contacts and replace them with someone more likely to respond. However, we encourage you to reach out to them directly to try and re-engage their participation.
Opted - Out
This contact has previously opted out of the survey. We will not send them the survey without you contacting us and confirming that you have received permission from the contact to include them again


Editing contacts
To edit any contact already on the table, hover over their row and click ‘Edit Panel Member’ on the right side. This will open the contact details so you can make any necessary updates.


3. Panel Health
You can check the health of your panel at the top of the page. This will help you monitor the quality of your panels. At a glance, you can see the overall health status of your panels.
Click the expand icon to view a full list of panels where you have permission to add contacts.
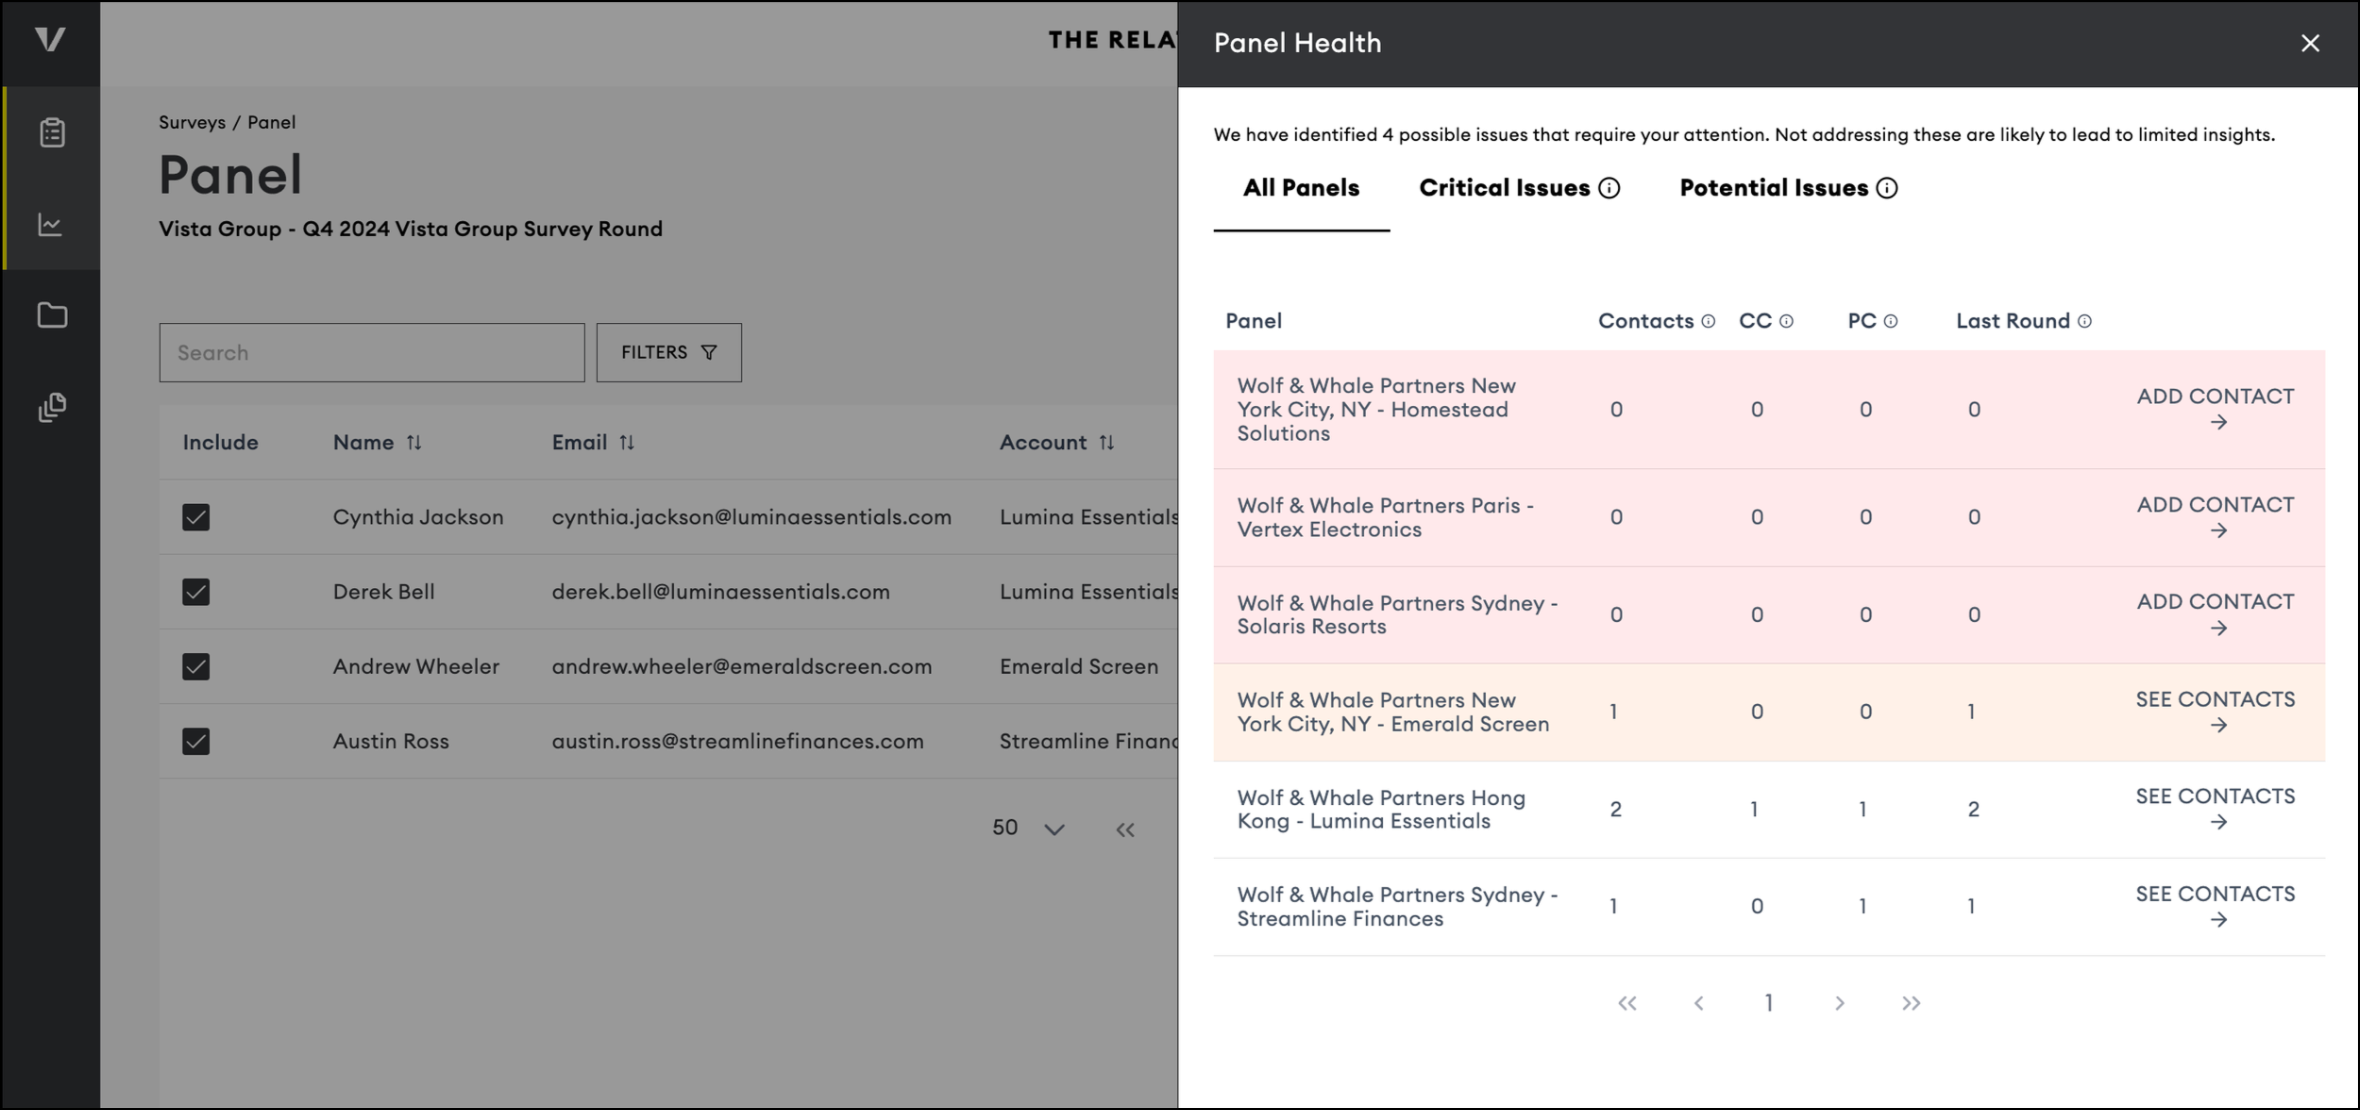
Health Status Categories

Critical Issue occurs when a panel has zero included contacts.
Without contacts, no insights can be generated for that Account/Office.
How to fix: Add at least one contact to the panel.

Potential Issue flags situations that may reduce panel effectiveness, such as:
Missing Critical/Primary contacts (needed for deeper insights).
A sharp drop in the number of contacts compared to the previous round.
If the change was intentional, you can safely ignore this flag.
If not, you can fix the issue by adding additional contacts and assigning Critical/Primary contacts.

Good Panel
A panel health is marked Good when there are no Critical or Potential Issues detected.

4. Collaborating On A Panel
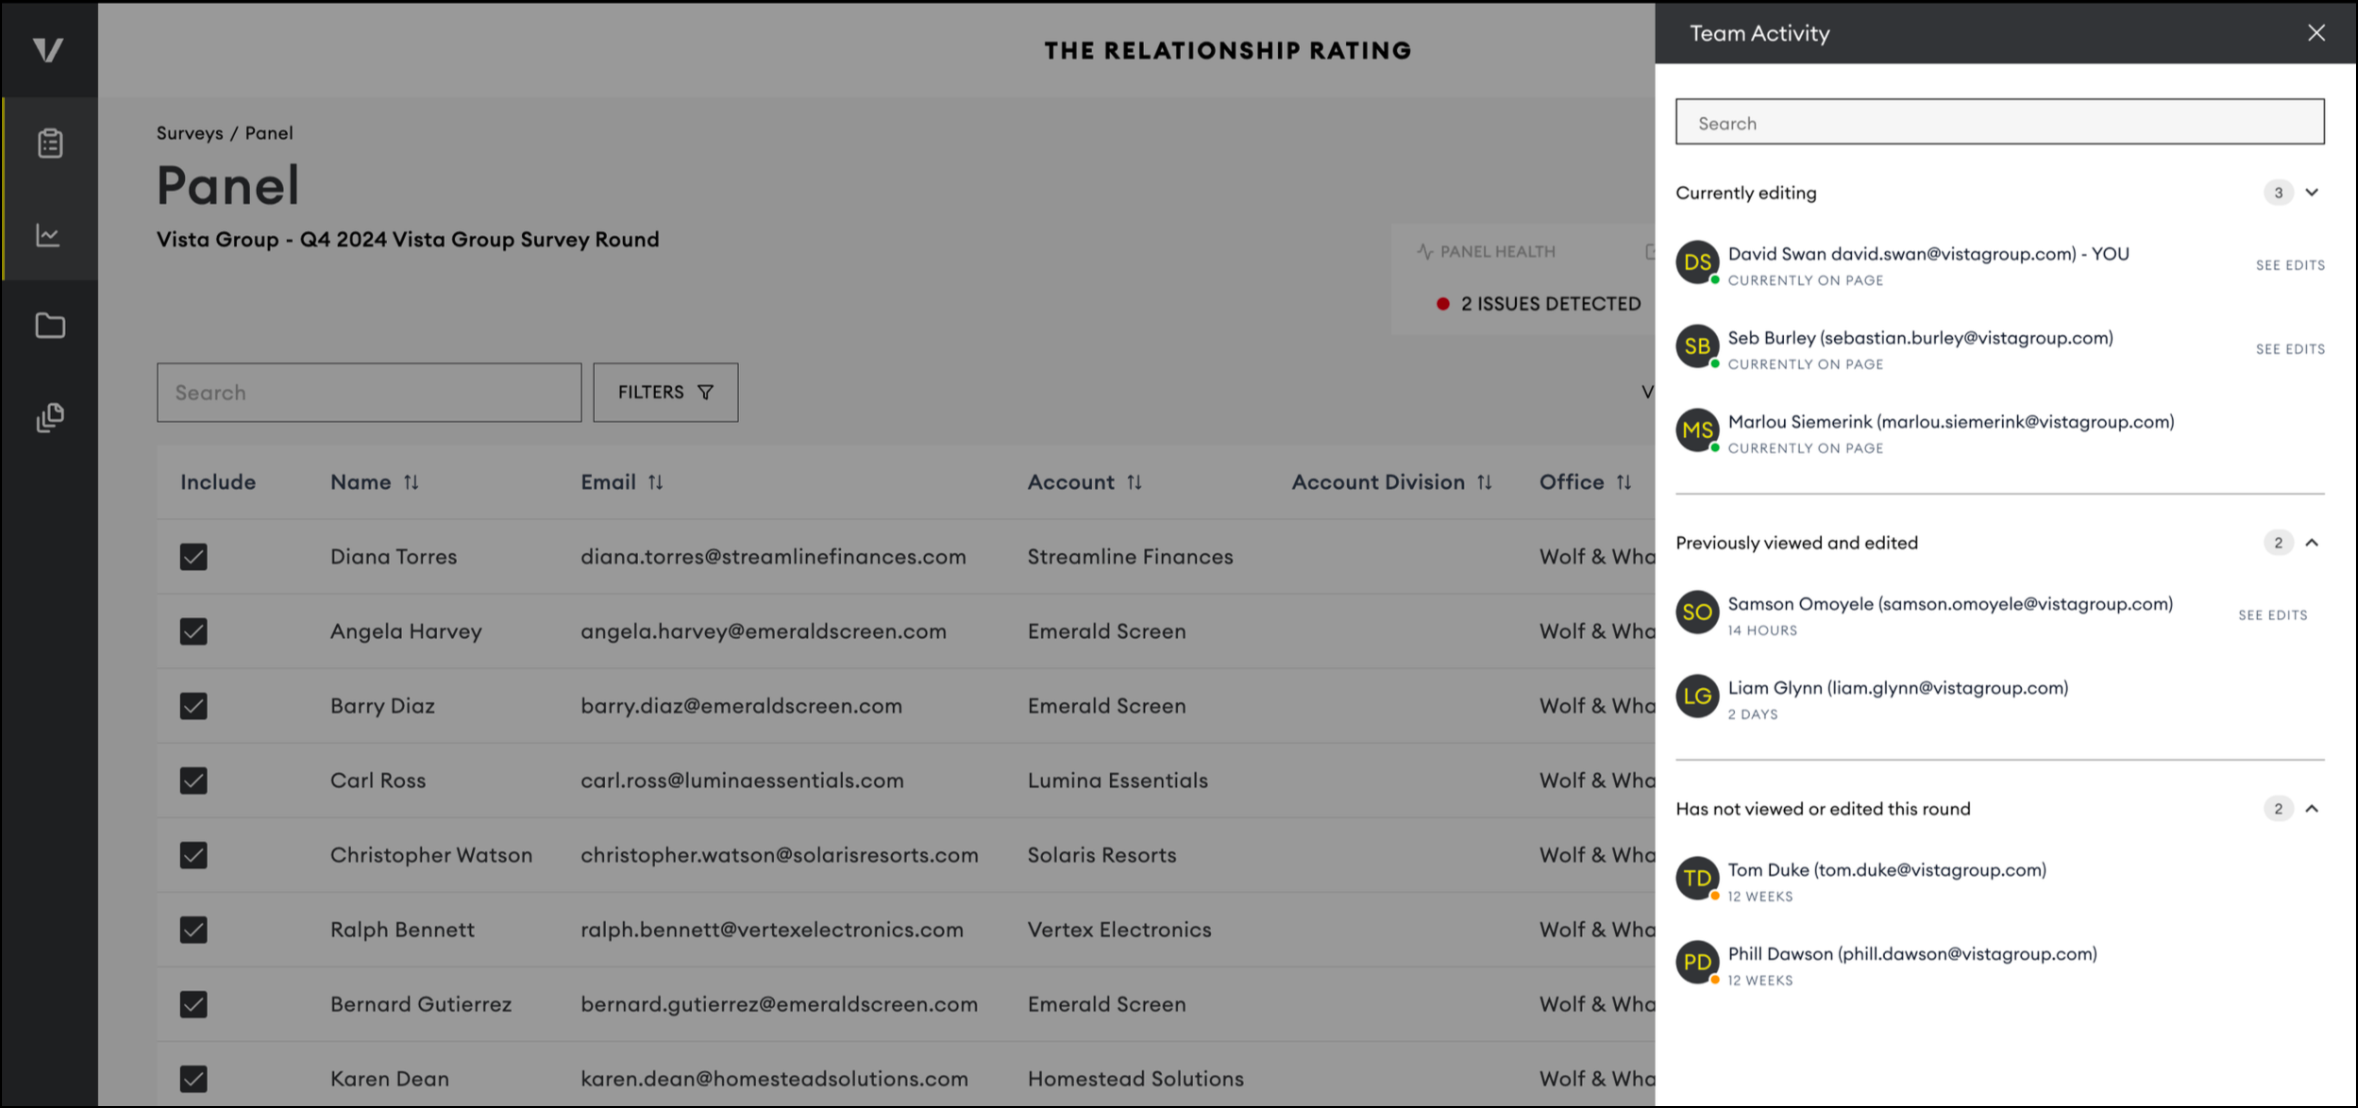
The panel saves changes automatically, so there is no need to manually save your progress while making updates. You can see who is currently viewing or updating the panel in the top right corner of the page.
By clicking the arrow icon, you can view a full list of team members and their activity status:
Currently editing
Previously viewed or edited
Has not viewed or edited this survey round
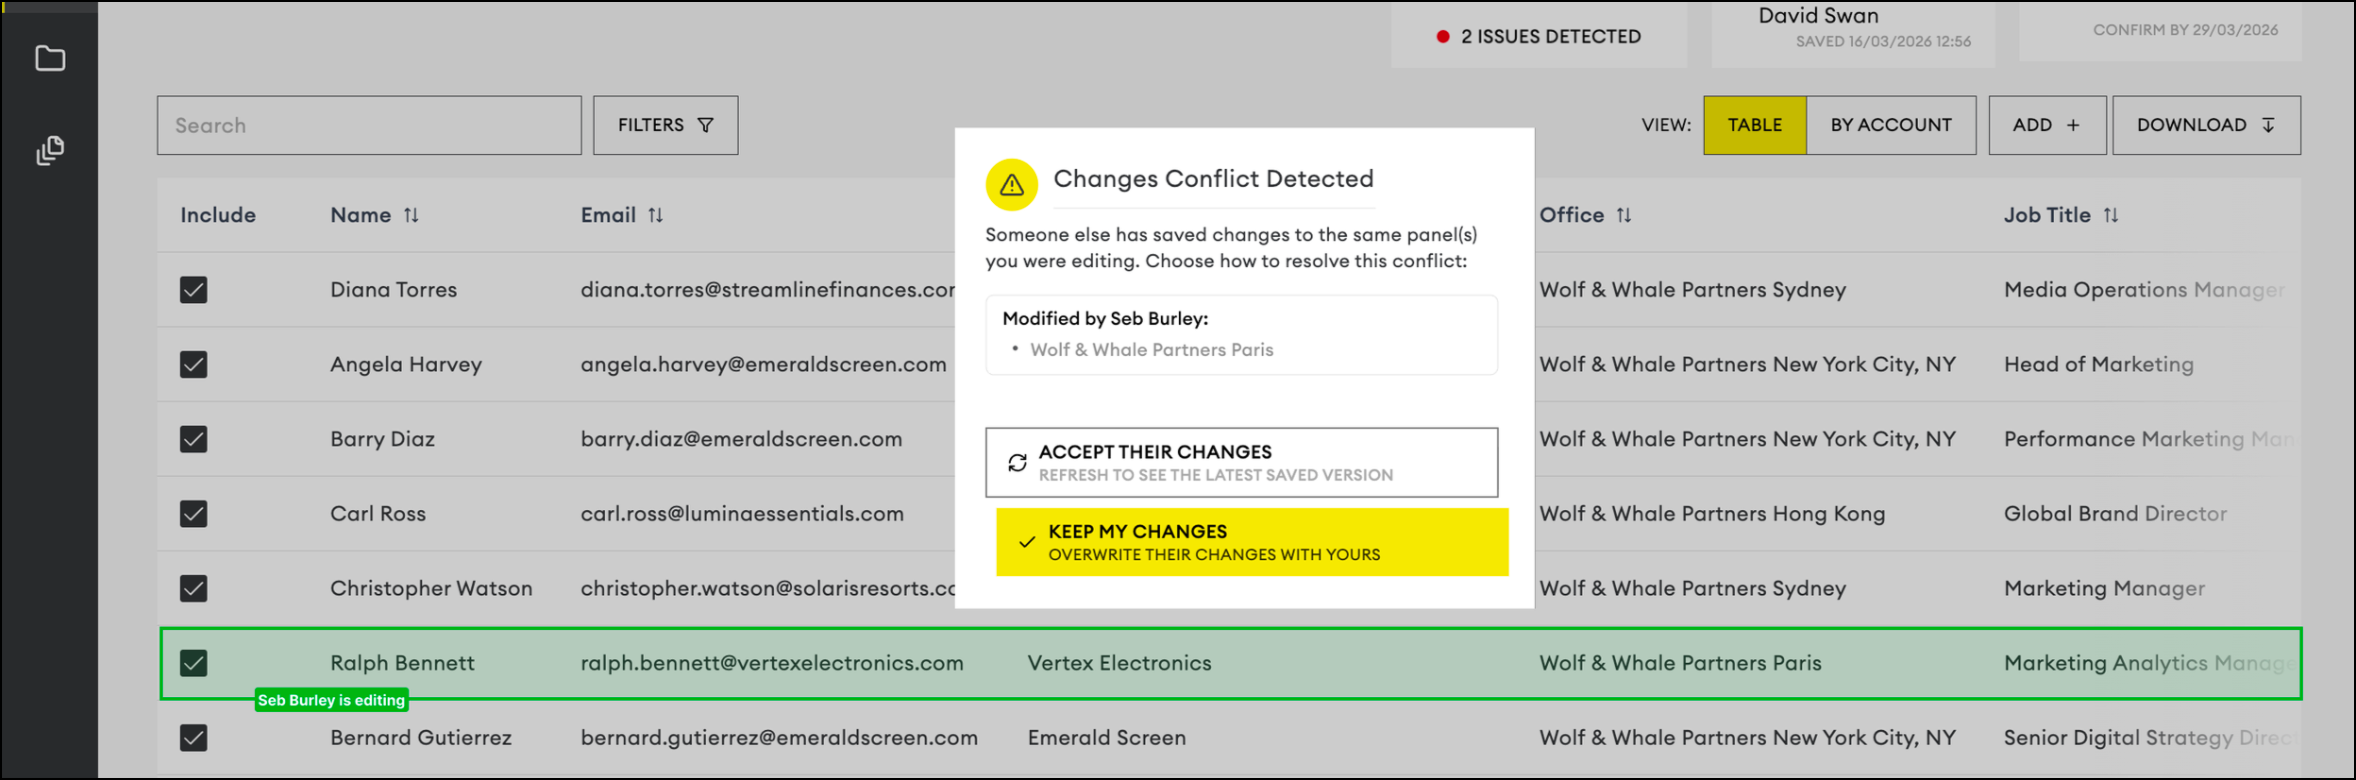
You will also be able to see which row a team member is currently editing and be alerted if you are about to make contradicting changes. You will be notified if someone is using the Mass Update tool to upload a spreadsheet of changes.
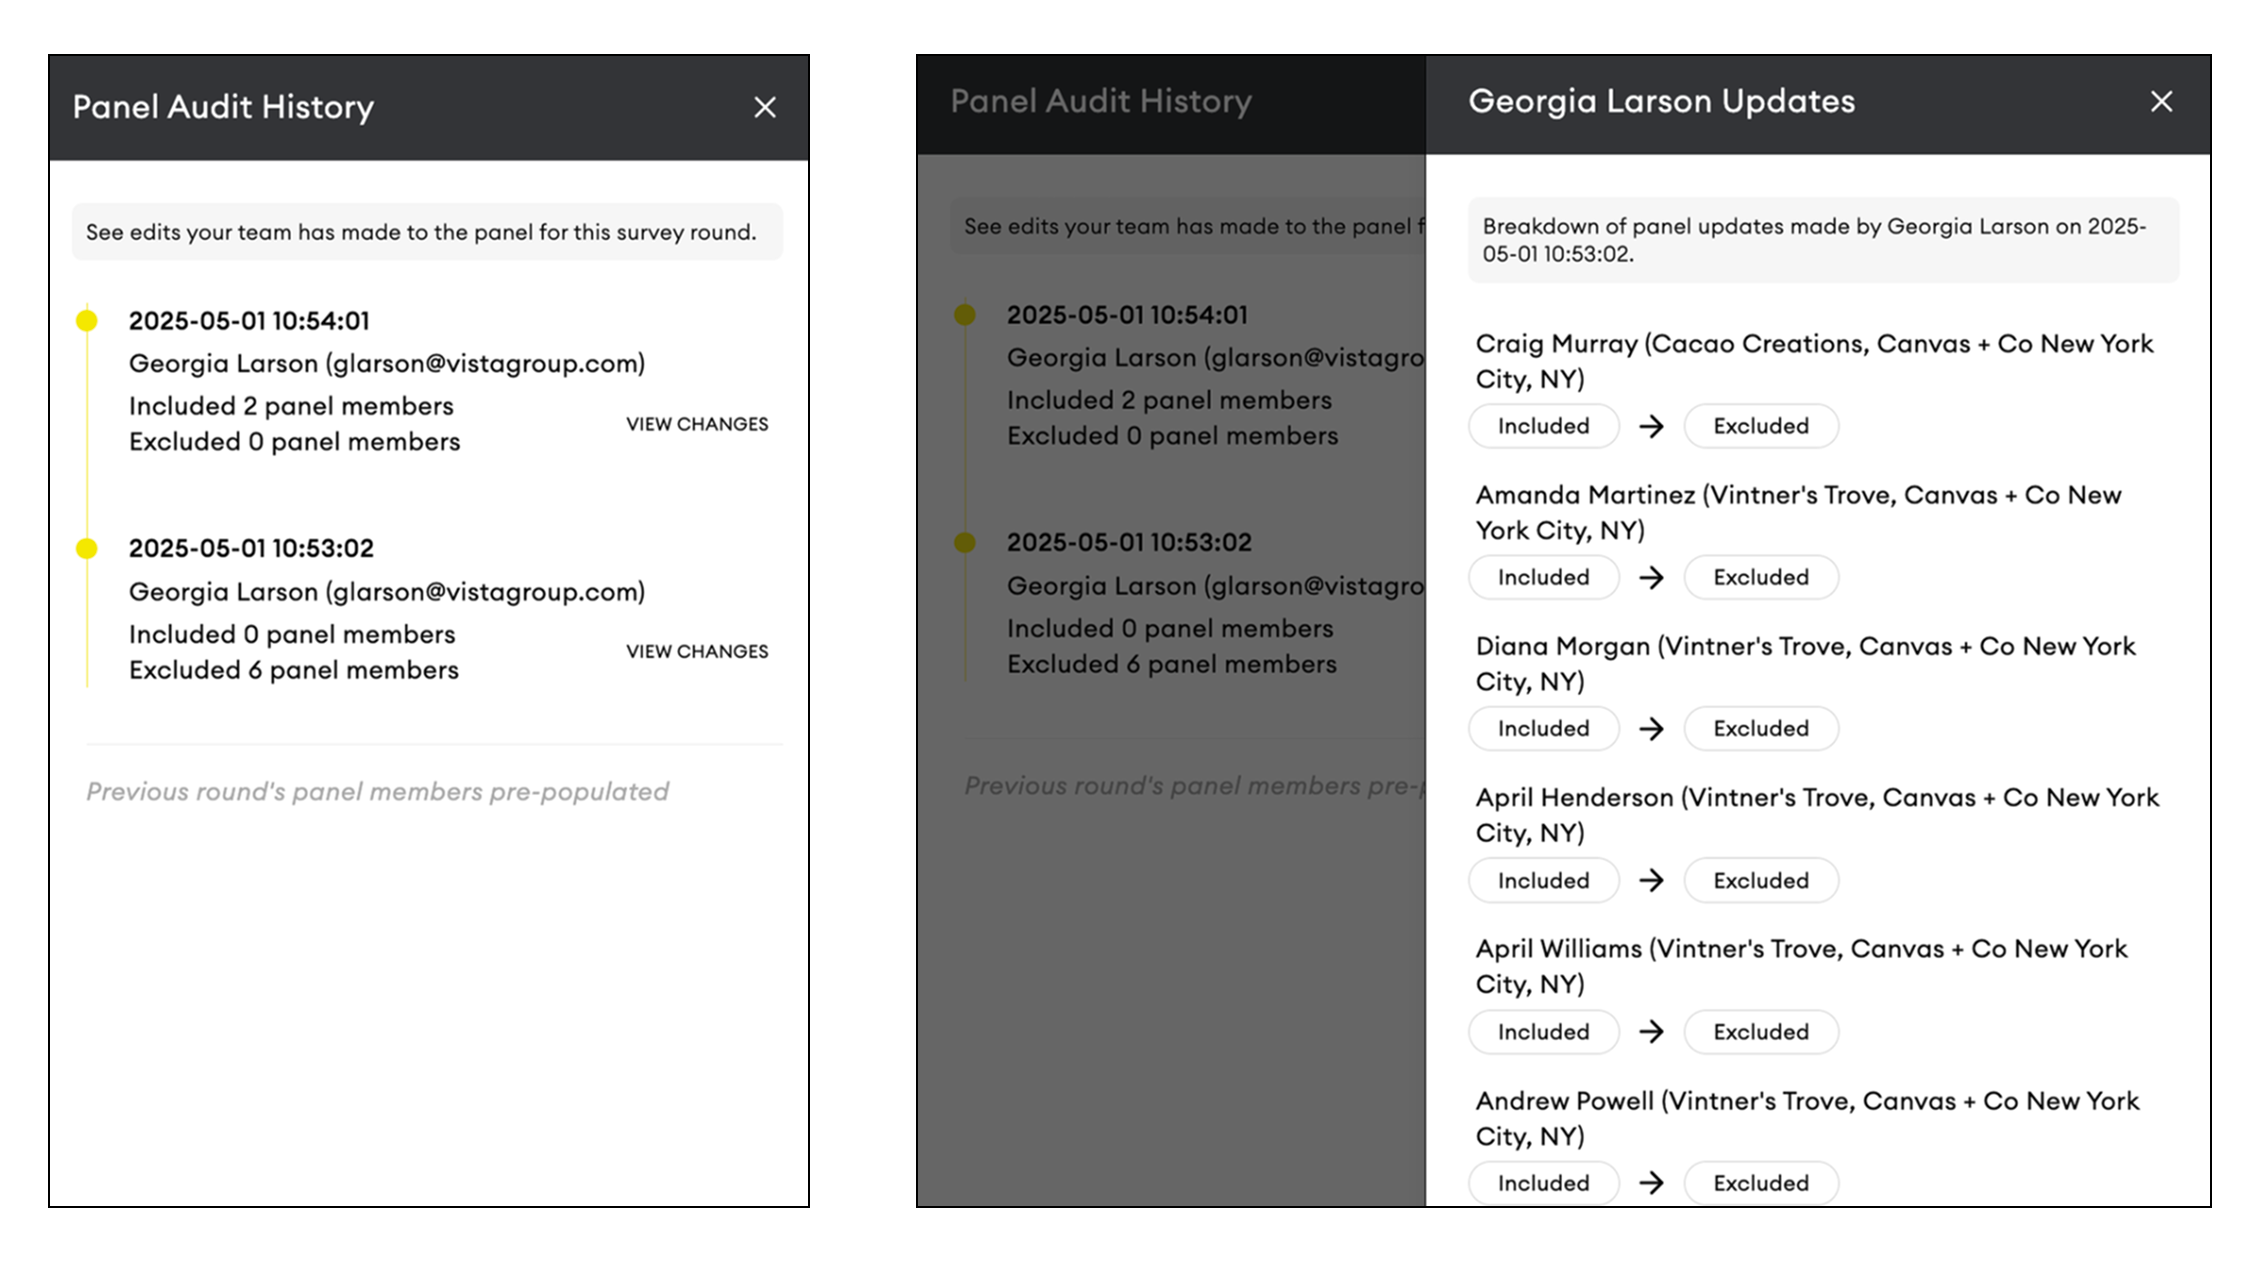
Audit History
If another member of your team has made updates, you can review their changes by expanding the Audit History card at the top of the page. See more details of their changes by clicking View Changes
5. Confirming Your Panel
Once you have made updates to your Panel, confirm by making sure the contacts you want surveyed are checked as ‘include’ on the left-hand side. You’ll be able to see the number of induced contacts in the top corner

What happens next
After the deadline the page becomes view-only. You can still see panel health, audit history, and download a spreadsheet. You can also view who responded and email them survey links.
After confirming your panel, notify contacts that the survey is coming and encourage them to respond.

Please ensure all necessary updates to your panel are completed before the “Confirm By” date next to the total number of included contacts.
After the Confirm By date has passed, the panel will be locked, and no further changes can be made.
The survey will go live shortly after the Panel Update Stage closes. You can see the exact date in the email notification we provide you with.
HOME | ACCOUNTS | PANELS | SURVEY DESIGN | MANAGE RESPONSE | VIEWING RESULTS | ARTICLES